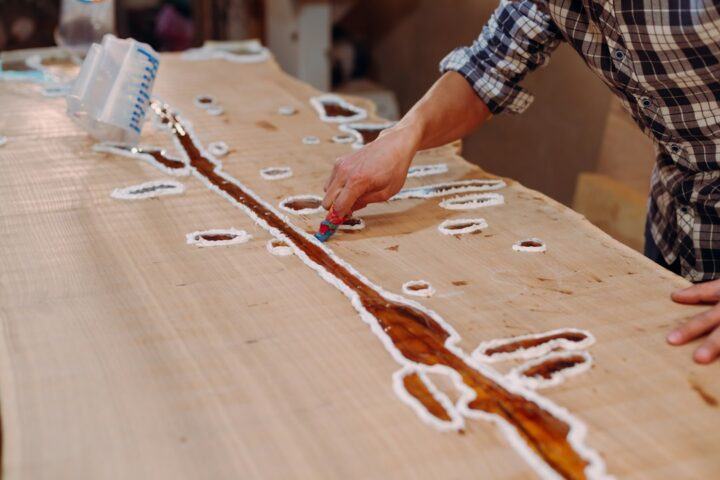
How to Pour Epoxy Resin
Updated 9 October 2026

Knowing how to pour epoxy resin well is a skill in its own right, separate from mixing and separate from finishing. The same batch of perfectly mixed resin can produce a clear, flawless surface or a mess of bubbles, splashes and uneven colour, depending entirely on how it leaves the cup. Speed, height, the shape of the stream and the way you move it all shape the result.
The good news is that pouring technique is universal. Whether you are filling a coaster mould, laying colours on an art panel or flooding a river channel when you make a resin table, the same principles apply. This guide covers the hand skills that make every pour cleaner.

Before you pour: set up for control
Good pouring begins before you lift the cup. Have everything within reach, because once resin is mixed the clock is running. Make sure the surface or mould is level, protect the floor and the bench, and plan the route your hand will take. If you are pouring over timber, check you know how to seal wood for epoxy first, or bubbles will rise from the grain.
- Choose the right container: a jug or cup with a pouring lip or a squeezable spout gives far more control than a wide bucket.
- Decant large batches: pouring from a smaller jug refilled from the main bucket is much easier to steer.
- Light the work well: a low, raking light reveals ridges, gaps and bubbles as you go.
Wear nitrile gloves and eye protection, ventilate the room and use an organic-vapour respirator. Splashes happen, especially when you are learning.
How to pour epoxy resin: speed and height
Pour speed and pour height are the two controls that matter most. A slow, steady pour lets the resin settle without folding air into itself. Pouring too fast causes the stream to churn, trapping bubbles and creating ripples that take time to level.
Height works in a similar way. Pouring from very high adds energy to the stream, which can splash and drive air in. Pouring very close to the surface is gentle, but it can be hard to see what you are doing. A useful starting point is to hold the lip of the cup a short distance above the surface, low enough that the stream lands softly and high enough that you can watch where it goes.
Some makers deliberately pour from a little higher to thin the stream, since a thin stream lets some trapped air escape as it falls. Experiment on a scrap to find the balance for your resin.
Ribboning: the thin, steady stream
Ribboning means pouring in a thin, continuous ribbon rather than a heavy glug. As the ribbon stretches, it thins, and bubbles in the stream are more likely to burst before landing. The ribbon also lands gently and spreads evenly, which helps keep the surface flat.
- Tilt the cup gradually until a steady ribbon forms, then hold that angle.
- Keep the ribbon unbroken: stopping and starting creates blobs and air pockets.
- Pour onto the resin already laid where possible, so new resin rolls in rather than crashing onto a dry surface.
- Move steadily in a planned pattern, such as lines, a spiral or a zigzag, so the coverage is even.
Multi-colour pours
Pouring several colours together is where technique really shows. The order, the amount and the way each colour meets the others decides whether you get crisp bands, soft blends or muddy grey.
- Pour in sequence: lay down the main colour first, then add accents into it while it is still fluid.
- Use parallel lines for clean bands, or pour colours into one cup and tip them out together for a layered flow.
- Control the meeting point: colours poured on top of each other blend more, colours poured side by side stay distinct.
- Do not overwork: every extra stir and tilt mixes the colours further. Stop while they still look slightly too separate.
Plan your colour quantities beforehand, so you are not mixing a top-up batch while the first colours begin to thicken.
Levelling with spreaders
Resin is self-levelling up to a point, but it often needs help to reach the edges and corners, especially in thin coats. A flexible plastic spreader, notched trowel or foam brush lets you guide it without scraping the surface.
Hold the spreader at a low angle and push the resin, rather than dragging it. Work outward from the centre, using light pressure so you move the resin without leaving lines. Once it has covered the area, step back and let gravity finish the job. A gentle pass of warm air at this stage helps release surface bubbles and calm any spreader marks. Our guide on how to remove bubbles from epoxy covers the options.
How to pour epoxy resin without common mistakes
Most pouring problems come from rushing. Dumping resin in one go traps air and causes uneven depth. Stopping and starting creates lumps. Working too slowly with a fast resin means the last section has thickened before it levels. And pouring onto a surface that is not level leads to pooling at one end.
The cure is preparation and rhythm: set up first, pour steadily, keep moving and leave the resin alone once it is down.
Pouring into moulds versus onto open surfaces
The target changes the technique slightly. When filling a mould or channel, pour into the lowest or deepest point and let the resin rise and spread outward, so it pushes air ahead of it rather than trapping pockets in corners, a technique our deep pour epoxy tutorial builds on. When coating an open surface, start in the centre and work outward in overlapping passes, keeping a wet edge so new resin always meets fluid resin. Around embedded objects or tight gaps, a slow trickle down a stirring stick lets resin creep in without splashing or burying air underneath.
Before your first pour, it is worth reading MIT’s epoxy resin safety procedures, which set out the health risks of resins and curing agents, the protective kit to wear, safe handling while curing, and what to do about spills.
Frequently asked questions
How high should I hold the cup when I pour epoxy resin?
Start low enough that the stream lands softly without splashing. A thin, steady ribbon from a short height usually gives the fewest bubbles.
Why do my colours turn muddy?
Overworking is the usual cause. Pour colours alongside each other, tilt sparingly and stop before they fully blend.
Should I spread resin or let it level on its own?
Both. Use a spreader to guide resin to the edges, then leave it alone so it can self-level.
Watch a pour in real time
For a look at a finished resin table where every layer was poured with care, watch this video from the Go Bespoke YouTube channel, @go-bespoke.
Top 10 most-watched on YouTube
Video 1 of 10 — one of the most-viewed YouTube videos for “how to pour epoxy resin”: Bathroom Sink of Epoxy resin and Tinsel Christmas Tinsel in Еpoxy Resin! by Positive couple. Позитивная парочка. (19,328,194 views as of 13 October 2026).
Prefer to leave the pouring to us? Get in touch for a bespoke quote.
All guides in this section
- Deep Pour Epoxy: Complete Guide and TutorialDeep pour epoxy explained: choosing a resin, layer depths, managing heat, timing layers and a step-by-step tutorial for river tables and thick…
- Epoxy Resin for Beginners: Everything You Need to StartEpoxy resin for beginners: what kit to buy, how to set up a workspace, five first projects and the common mistakes to…
- Epoxy Sealer for Wood: How to Seal Timber Before and With EpoxyHow to use an epoxy sealer for wood: stop bubbles, seal live edges and end grain, stabilise soft timber with penetrating epoxy,…
- Epoxy Wood Filler: Fill Cracks, Knots & VoidsHow to use epoxy wood filler on cracks, knots, bark voids and screw holes: choosing a filler, tinting, filling in stages, sanding…
- How Long Does Epoxy Take to Dry and Fully Cure?How long does epoxy take to dry and fully cure? Typical times by product, temperature and thickness, plus how to speed curing…
- How Much Epoxy Do I Need? Epoxy Calculator and GuideHow much epoxy do I need? Use our free epoxy calculator for litres and US gallons, plus worked examples, typical resin prices…
- How to Epoxy a Table Top: Flood Coat Step by StepHow to epoxy a table top: seal coat, 3 mm flood coat, edges, drips, bubbles and curing, with quantities and mistakes to…
- How to Make a Live Edge TableHow to make a live edge table: choosing a slab, flattening with a router sled, finishing with oil and fitting legs. No…
- How to Make a Resin TableHow to make a resin table from start to finish: the tools you need, workspace set-up, safety equipment and every stage of…
- How to Make a River TableHow to make a river table: preparing and orienting slabs, building and sealing a melamine mould and levelling it before the pour.
- How to Polish Epoxy ResinHow to polish epoxy resin: grit progression, wet sanding, polishing compounds and buffing pads for a gloss, satin or matt finish.
- How to Use Epoxy Resin: A Practical GuideHow to use epoxy resin: mix ratios, measuring, pot life, temperature, layering, curing times, clean-up and safety in one practical reference.
- Table Top Epoxy: How to Choose and Apply ItTable top epoxy explained: how to choose a coating resin, how much you need and how to epoxy a table top step…
- Wood Rot Repair Epoxy: Fix Rotten Wood for GoodWood rot repair epoxy step by step: remove rot, dry, consolidate and fill sills, door frames and garden furniture, then prime and…