Table Top Epoxy: How to Choose and Apply It
Updated 16 October 2026
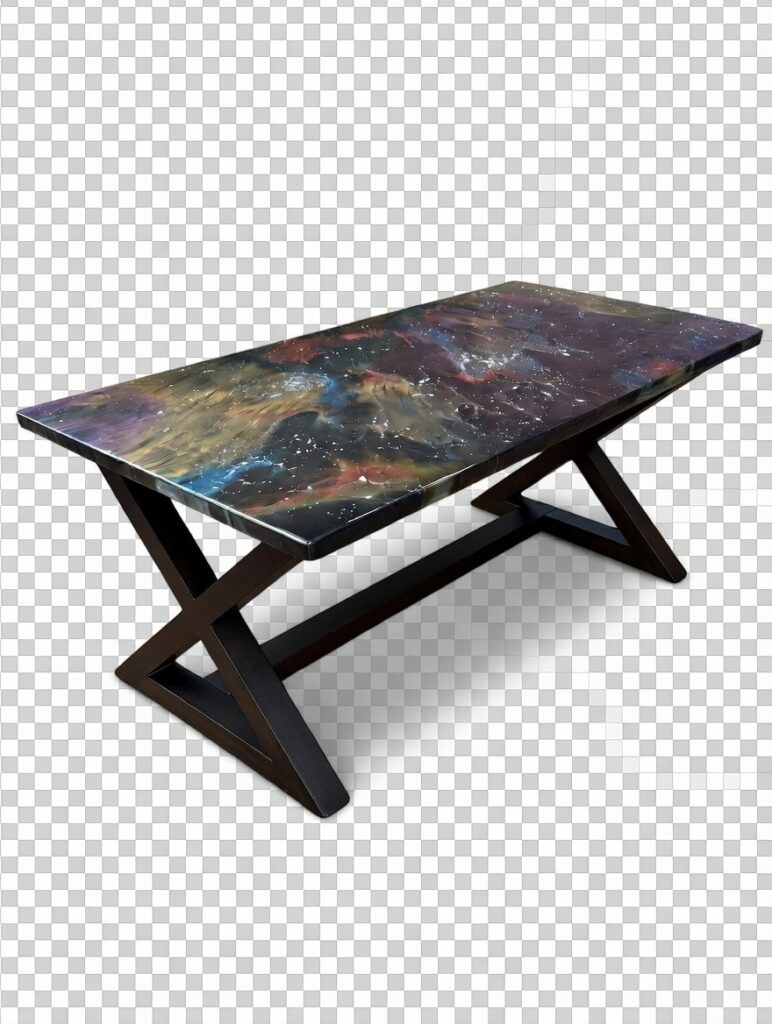
Table top epoxy is the resin that gives a finished table its deep, wet-look gloss. Poured a few millimetres thick, it levels itself into a smooth, hard, waterproof skin that makes grain, colour and inlays look as though they sit beneath a sheet of glass. Choose the right product and apply it calmly, and the result rivals a professional finish; pick the wrong one or rush the preparation, and you get ripples, dust and bubbles locked in for good. This guide explains what table top epoxy is, how to choose one, how much you need and exactly how to epoxy a table top, step by step.
What is table top epoxy?
Table top epoxy resin is a coating epoxy. It is thicker and faster-curing than the casting resin used for river channels, and it is formulated to be poured in thin layers, typically up to about 3 to 6 millimetres per coat depending on the brand. That honey-like viscosity lets it cling to a surface and level out into an even film rather than soaking away. The faster hardener gives a harder, more scratch-resistant surface, but it also means the resin generates heat quickly, which is why it must never be poured deep. For thick sections, use a deep pour epoxy instead and finish with a coating resin on top.
Most products are sold as a two-part kit, often mixed one to one by volume. Always follow the ratio on the label in front of you: a few per cent off and the coat can stay soft or tacky.
How to choose the best table top epoxy resin
Brand names come and go, and popular kits such as TotalBoat Table Top and the various table top pro epoxy resin and hardener bundle kits all do broadly the same job. Rather than chase a name, compare these points on the datasheet:
- Maximum coat thickness. Tells you how much build you get per pour.
- Working time. Usually 20 to 45 minutes. Longer is kinder for large tops and first-timers.
- Clarity and UV stabilisers. A superclear, water-white formula matters on pale timbers and white designs. Our page on UV resistant epoxy resin explains what stabilisers can and cannot do.
- Hardness and heat resistance. Look for a published Shore D hardness and a heat deflection figure. Bars and kitchen tables need the toughest finish; see bar top epoxy for high-wear surfaces.
- Food-contact and VOC information. Useful for dining and kitchen tables.
- Kit size. Buy enough for the whole job plus a margin, from the same batch if you can. A matched epoxy resin kit keeps ratios simple.
The best table top epoxy resin for you is the one whose working time, thickness and hardness match your project and your room temperature, not the one with the boldest label.
How much table top epoxy do you need?
A simple table top epoxy calculator is length times width times thickness. In metric, length (cm) x width (cm) x depth (cm) gives cubic centimetres, which equals millilitres. For example, a 180 x 90 cm dining table with a 3 mm coat needs 180 x 90 x 0.3 = 4,860 ml, so roughly 5 litres of mixed resin. Add 10 to 15 per cent for the edges, drips and the resin left in the bucket. If you plan a seal coat first, budget extra for that too. Our epoxy calculator does the arithmetic for river and coating pours.
How to epoxy a table top, step by step
The method below is for a flood coat over a finished, sanded timber or resin table. The same principles underpin every pour, and our how to pour epoxy resin hub covers mixing and bubble control in greater depth.
- Prepare the room. Bring the room, the table and the resin to the temperature on the datasheet, usually about 21 to 25 degrees Celsius, and keep it stable for at least 24 hours after the pour. Vacuum the floor and any shelves above the table, and turn off fans that blow dust.
- Sand and clean the surface. Sand bare timber to around 120 to 180 grit; scuff previously coated resin with 220 to 320 grit so the new coat grips. Remove old wax or polish completely. Vacuum, then wipe with isopropyl alcohol and let it flash off.
- Seal the timber. Brush a very thin coat of the same epoxy over bare wood, including any open grain and end grain, and let it go tacky. This stops air escaping from the wood as bubbles in the flood coat. Our page on sealing wood for epoxy explains why.
- Level the table. Use a long spirit level in several directions and shim the legs or trestles. Self-levelling resin runs to the low side of a table that is not level.
- Decide on dams or drips. Tape dams around the edge keep resin on the top only; a drip edge lets resin flow over the sides for a wraparound gloss. Protect the floor with plastic sheeting either way and raise the table on blocks.
- Measure and mix. Measure exactly, pour hardener and resin into a clean straight-sided container and mix slowly for the full time stated, often three minutes, scraping the sides and bottom. Transfer into a second container and mix again briefly so no unmixed resin from the walls reaches the table.
- Pour and spread. Pour in a zigzag across the middle and guide the resin to the edges with a plastic spreader or foam roller, then leave it to level. Brush the sides smooth if you chose a drip edge.
- Pop the bubbles. Pass a heat gun or small torch quickly across the surface a few centimetres above it. Keep moving; lingering scorches the resin and can cause dimples.
- Protect it while it cures. Cover the table with a clean box or tent that does not touch the surface, and stay out of the room for the first few hours while it is most sensitive to dust.
- Recoat if needed. Within the recoat window you can pour a second coat directly; after it, sand the first coat lightly with 320 grit, clean and repeat.
Most coatings are touch-dry in about a day, ready for light use after three days and fully hard after about a week. Keep hot items and heavy objects off until then.
Safety when using table top epoxy
Wear nitrile gloves, not latex, and safety glasses when mixing. Epoxy can cause skin sensitisation that becomes a lifelong allergy, so avoid all skin contact and clean spills with paper towels and isopropyl alcohol, never with your bare hands. Ventilate the room well, and use a respirator with organic vapour cartridges if you are working for long periods or in a small space. Never pour leftover mixed resin into a deep pot and leave it, as it can overheat; spread it thinly on plastic to cure.
Common table top epoxy mistakes
- Fish-eyes and craters come from contamination such as silicone, wax or furniture polish. Clean thoroughly before you pour.
- Soft or sticky patches mean inaccurate measuring or poor mixing.
- Ripples or a wavy surface often come from pouring too thick or a cold room.
- Bubbles rising for hours usually mean the timber was not sealed.
- Dust and hairs are prevented by a clean room and a cover, not by luck.
Epoxy table top ideas
A clear coat is only the start. Unique epoxy table top ideas include coating over a map, photographs or pressed botanicals; setting coins, bottle caps or tiles into a shallow tray; tinting a thin top layer with translucent colour; or flooding a table that already has a resin river so the whole surface shares one seamless gloss, the look a clear epoxy table is built around. For bigger design ideas and every style of table, start at our epoxy table guide. If a coat ever dulls or scratches, our guide on how to polish epoxy resin shows how to bring it back.
Top 10 most-watched on YouTube
Video 1 of 10 — one of the most-viewed YouTube videos for “table top epoxy: how to choose and apply it”: Quilted Chest of Drawers. Table Top made of Foil, Stones and Epoxy resin. by Positive couple. Позитивная парочка. (20,882,162 views as of 13 October 2026).
Coating a whole tabletop means handling a lot of resin, so it is worth reading the EU-OSHA guide to occupational exposure to epoxy resins, which covers skin sensitisation, vapours and sensible controls such as ventilation and the right gloves.
Watch it being made
See one of our tables come together in the workshop: a nebula resin top with fibre optic stars, from the first pour to the lights going on.
Resin art nebula resin table with fibre optic art. More builds on the Go Bespoke YouTube channel.
Frequently asked questions
Can I use table top epoxy for a river table?
Not for the river itself. Table top epoxy is designed for thin coats and will overheat if poured deep. Use a casting resin for the river and table top epoxy, or an oil finish, for the final surface.
How thick should an epoxy table top coat be?
Follow the maximum on the datasheet, usually around 3 to 6 millimetres per coat. For more build, pour several coats rather than one thick one.
Can you put epoxy over a painted or varnished table?
Often yes, provided the existing finish is sound, fully cured and scuff-sanded so the epoxy can grip. Test a small hidden area first, as some finishes react with resin.
Is table top epoxy heat resistant?
It handles warm mugs and plates, but most coating epoxies soften well below the temperature of a hot pan. Always use trivets and coasters.
How long before I can use a table after epoxy?
Typically light use after about three days and full use after around seven, depending on the product and room temperature.
Need a finished table instead?
If you would rather leave the pouring to someone else, our London workshop builds resin and fibre optic tables to order. Get in touch to talk through a bespoke table.