Ocean Epoxy Table
Updated 9 October 2026
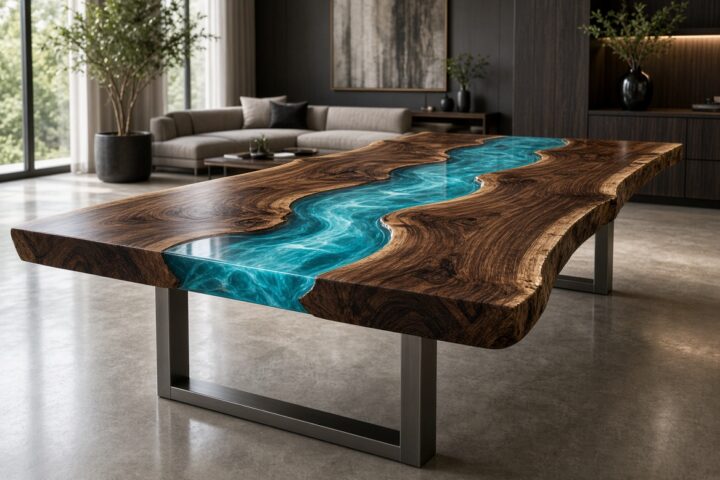
An ocean epoxy table tries to capture a moment most of us remember from a cliff path or an aeroplane window: the coast seen from above, with pale sand, glassy turquoise shallows and a sudden drop into deep navy water. The best examples feel less like a coloured river and more like a tiny slice of coastline frozen under glass.
Realism is the goal here. This page focuses on how a seascape is designed, from the gradient that runs from shallows to depths, to the white foam patterns, to the sand and pebble shorelines that make the eye believe it is looking at a real beach.

Designing an ocean epoxy table from above
Most convincing sea tables are styled as aerial beaches. Imagine a drone hovering over a cove: the timber becomes the land, its live edge becomes the coastline, and the resin becomes the water. Thinking from this viewpoint helps every later decision. Waves run parallel to the shore, colours deepen with distance from land, and foam gathers where water meets sand.
Before mixing anything, sketch the layout on paper or directly on the mould. Mark where the shore sits, where the water gets deep, and where the brightest shallows will be. Real coastlines are rarely symmetrical, so let one side have a wide sandy bay and the other a steeper rocky edge.
Gradients across an ocean epoxy table: from shallows to depths
Water colour changes because depth absorbs light. Near the shore you see sand through clear, slightly green water; further out the colour shifts to turquoise, then to teal, then to a deep inky blue. Recreating that gradient is the heart of a realistic seascape.
- Shoreline zone: nearly clear resin with the faintest hint of aqua, so the sand texture beneath shows through.
- Shallows: bright translucent turquoise, the colour people instantly associate with tropical water.
- Mid-water: teal and ocean blue, slightly less translucent.
- Depths: deep navy or midnight blue, often more opaque, which hides the base and creates a sense of real depth.
Blending the borders between these bands is what separates a sea from a striped flag. Makers often pour adjacent colours at the same time and drag them together with a stick or gloved finger, so they feather into each other rather than meeting in hard lines.
White lacing and cells
Foam is the detail that brings the scene alive. On an ocean epoxy table, a thin layer of white resin is laid along the shoreline and over the shallows, then encouraged to open into a lacy network of cells. Seen from above, this mimics the delicate foam left by a wave as it slides back down the beach.
Design matters as much as technique, just as it does on any artistic epoxy table. Foam lines should echo the shape of the coast, appear in a few staggered rows rather than one, and fade as they move further out to sea. Too much white looks like snow; too little looks flat. The lacing method behind an ocean wave epoxy table has its own page on our site, so here the key point is placement: foam belongs where the water breaks, not scattered at random.
Sand and pebble shorelines
A real beach has texture, and texture makes resin water believable. The transition from timber to water can be built up with several materials:
- Fine sand: sealed with a thin coat of resin first so it does not release air bubbles, then laid along the edge of the timber.
- Small pebbles and crushed shell: placed in clusters at the waterline, partially submerged so the shallows wash over them.
- Tinted resin sandbars: a creamy, slightly opaque resin poured in soft curves to suggest underwater sand ridges in the shallows.
- Rocks and reef shapes: darker pebbles or pigmented resin just below the surface hint at reefs, adding variety to the blues.
Layering is the secret. Pour a base layer, set the sand and stones, then pour the coloured water over the top. The shallows then look like real water lying over the beach rather than paint beside it. Always seal porous materials before encasing them, and make sure shells and stones are clean and completely dry. The same layering of inclusions under clear resin is what gives a geode resin table its sparkle.
Small details that sell the illusion
Realism often comes down to touches that viewers never consciously notice. A faint darker line where wet sand meets dry sand, just a shade deeper than the beach behind it, instantly suggests a tide line. A few slightly greener patches in the shallows hint at seagrass or weed below the surface. Tiny pale ripples, dragged with a fine stick across the sandbars, look like sunlight patterns on the seabed. A touch of the pearl pigment used on a metallic epoxy table can add the glint of sun on the shallows.
Scale matters too. Pebbles that are too large make the table look like a model railway, while very fine gravel reads as a real beach seen from height. Keep shells small and few, and resist the temptation to add starfish or boats unless you want a playful rather than realistic feel, which belongs more with unique resin table designs such as map tables. When in doubt, look at aerial coastal photos and copy what you actually see.
Choosing timber for a seascape
Timber plays the land. Pale woods such as oak, ash and elm suggest sunlit dunes and cliffs, while darker woods such as walnut give a moody, rocky coastline, a contrast taken to its extreme in a black epoxy table. A live edge works especially well because its irregular line already looks like a coast. Look for a slab with a natural cove or headland shape that you can follow with the sand and foam.
Safety and finishing
An ocean table involves several pours, so plan your workspace for days rather than hours. Ventilate well, wear nitrile gloves and eye protection, and use a respirator rated for organic vapours, particularly when sanding the cured surface. Once flattened and polished, a seascape benefits from a high-gloss finish, which gives the water its wet, reflective look.
If you are trying to recreate realistic sea colours, NOAA’s short explainer on why the ocean is blue is useful reading: water absorbs red light, so deeper areas look bluer, which is why darker pigment towards the centre of a pour looks so natural.
Frequently asked questions
How do I stop sand looking muddy inside an ocean epoxy table?
Use clean, dry, fine sand and seal it with a thin resin coat before the main pour. This locks the grains together and stops trapped air from clouding the water above.
Should the deep water be transparent or opaque?
Slightly opaque deep water usually looks more realistic. It hides the mould base and gives a sense of depth, while the shallows stay translucent.
Which timbers suit a beach-style seascape?
Pale oak, ash or elm read as sandy coast, while walnut reads as dark rock. Choose a slab whose live edge already looks like a coastline.
Watch the sea take shape in resin
For more coastal and lit resin builds, subscribe to the Go Bespoke YouTube channel, @go-bespoke, and see how our pieces are poured and finished.
Top 10 most-watched on YouTube
Video 1 of 10 — one of the most-viewed YouTube videos for “ocean epoxy table”: How to make an OCEAN TABLE – Awesome ideas – Epoxy Resin art by WoodWorking Art & Craft (37,746,721 views as of 13 October 2026).
Want your favourite beach captured in a table? Get in touch for a bespoke quote.