How to Make a Live Edge Table
Updated 16 October 2026
Knowing how to make a live edge table is one of the most rewarding woodworking skills you can learn, because the timber does most of the design work for you. The natural edge of the tree, with its waves, curves and shifting grain, becomes the defining feature of the finished piece. No resin is required: just a good slab, careful flattening, a hand-rubbed oil finish and a sturdy set of legs.
This guide is purely about the woodworking. It walks through choosing a slab, flattening it with a router sled, finishing it with oil and fitting legs so that the table sits solid and stays flat for years.
How to make a live edge table: choosing the slab
Everything starts with the slab. Take your time choosing it, because no amount of skill will fix a poorly dried or badly cracked board.
- Drying: buy slabs that have been properly air dried or kiln dried. Ask the timber yard how the slab was dried and for how long.
- Species: oak, walnut, elm, ash and maple all make excellent tables. Walnut is also the classic choice for a walnut epoxy table if you later add resin. Hardwoods resist dents and wear better than softwoods.
- Thickness: a slab around 40 to 60 mm thick looks substantial and leaves room for flattening.
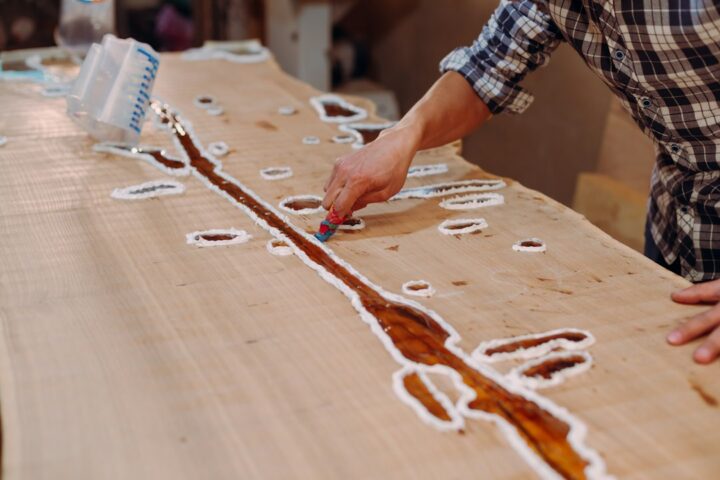
- Shape and flaws: look for an attractive edge, sound timber and minimal cupping or twist. Small cracks can be stabilised with butterfly keys or filled with resin, as on a wood and resin table.
Once home, let the slab acclimatise indoors for a few weeks, stacked flat with spacers so air circulates around it.
Planning size and proportion
Decide what the table is for before you cut anything. A dining table needs enough length for each place setting and enough overhang at the ends for knees, while a coffee table can be shorter and lower, with a slab that shows off its widest, most dramatic section. Lay the slab on trestles in the room where it will live and look at it from every angle, marking where you will crosscut the ends. Cutting away a split end or a dull section of grain often improves the finished piece, so be prepared to sacrifice a little length. If you would rather a maker did this for you, a custom live edge resin table lets you choose the slab yourself.
Cleaning up the live edge
Most makers remove the bark, because it tends to loosen and fall off over time. Lever it away gently with a blunt chisel or drawknife, then clean the cambium layer beneath with a stiff wire brush or a sanding flap wheel. Be gentle: the aim is to reveal the natural contour, not to carve it away. The same technique is used before a live edge resin table pour. Leave the gentle undulations; they are what make the table unique.
Flattening with a router sled
Wide slabs rarely fit through a planer, so the router sled is the standard solution. It is a simple jig: two level rails either side of the slab, with a carriage riding on them that holds a router fitted with a wide surfacing bit.
- Shim the slab so it sits steady and does not rock, using wedges under the low points.
- Set the rails level and parallel, checking with a long straight edge and spirit level.
- Take shallow passes, moving the router across the slab and stepping the carriage along in overlapping strokes.
- Flip and repeat once the first face is flat, using it as the reference for the second side.
Router sledding produces a great deal of fine dust and noise. Wear eye and ear protection and a well-fitted dust mask, and use dust extraction where possible.
Sanding the surface
The sled leaves faint ridges that need sanding away. Start with a coarse abrasive on a random orbital sander to remove the marks, then work through finer grits until the surface feels silky. Hand sand the live edge, following its curves. Raise the grain by wiping with a damp cloth, let it dry and give a final light sand, so the surface stays smooth after the first coat of oil.
Finishing with oil
An oil finish suits a live edge table perfectly. It soaks into the timber, deepens the colour and grain, and leaves a natural, tactile surface that you can repair easily if it gets marked.
- Hardwax oils offer good durability for dining tables and a satin finish.
- Danish and tung oil blends give a warm glow and are easy to apply by hand.
- Apply thin coats, wiping off the excess after the recommended time, and allow proper drying between coats.
Oily rags can self-heat and catch fire as they dry. Lay them flat outdoors to dry or store them in a sealed metal container with water before disposal. Ventilate the room while oiling.
How to make a live edge table stand firm: choosing and fitting legs
Legs define the character of the table. Steel hairpin legs suit a light, mid-century feel; flat steel frames or U-shaped bases look modern and industrial; chunky timber trestles bring a rustic, farmhouse look. Choose a height that suits the purpose, whether coffee, desk or dining table.
Timber keeps moving with seasonal humidity, so the fixings must allow it to expand and shrink across its width. Use slotted holes in steel bases or figure-eight fasteners and threaded inserts rather than gluing or rigidly screwing the top. Fit the legs with the top upside down on a protected bench, then turn it over and check that it sits level.
Slab moisture is the biggest cause of cracks and movement, so the US Forest Products Laboratory’s Wood Handbook is worth bookmarking; its chapters on drying and moisture content explain why a slab needs to be properly dried before it is flattened and finished.
Frequently asked questions
Do I need resin to make a live edge table?
No. A well-chosen slab, flattened and oiled, makes a beautiful table without any resin. If you do want resin, a live edge epoxy table frames or fills the edge with it. Small cracks can be stabilised with butterfly keys.
Can I flatten a slab without a router sled?
Hand planes and a lot of patience will do it, or a timber yard with a wide-belt sander may flatten it for you.
How do I stop my live edge table from cracking?
Start with properly dried timber, let it acclimatise indoors, finish both faces evenly and use fixings that allow seasonal movement.
Watch natural timber become furniture
For a look at how natural timber and craftsmanship come together in finished furniture, watch this video from the Go Bespoke YouTube channel, @go-bespoke.
Top 10 most-watched on YouTube
Video 1 of 10 — one of the most-viewed YouTube videos for “how to make a live edge table”: 25000$ How to make a table.Walnut and epoxy resin table WOODWORKING by AVSwood (26,752,029 views as of 13 October 2026).
Would you like a live edge table made to measure? Get in touch for a bespoke quote.