Epoxy Wood Filler: Fill Cracks, Knots & Voids
Updated 17 October 2026
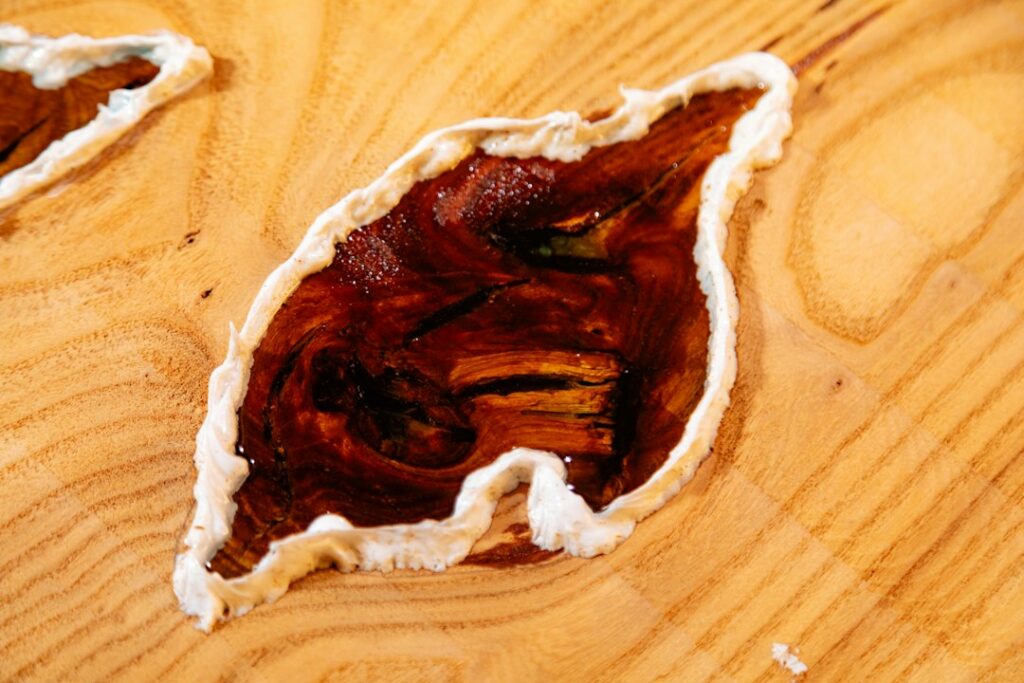
Every slab of characterful timber comes with a few surprises: a loose knot, a shake running along the grain, a pocket of bark, or a nail hole from a reclaimed beam. A good epoxy wood filler turns those flaws into features. Unlike solvent-based fillers that shrink and crack, two-part epoxy cures hard, bonds deep into the fibres and can be sanded, tinted and polished flush with the surface. This guide shows you how to fill wood with epoxy properly, from choosing the right product to the final sanding pass.
If you are new to working with resin, it is worth reading our step-by-step guide on how to pour epoxy resin first, as the same mixing and safety principles apply to filling small defects.
What is an epoxy wood filler?
An epoxy wood filler is a two-part system: a resin and a hardener that react chemically when mixed. Rather than drying by evaporation, it cures right through, so there is next to no shrinkage. That makes it ideal for deep checks, knot holes and voids where a conventional filler would sink back or pop out over time.
There are two broad families you will see on the shelf:
- Liquid epoxy resin used as a filler – a thin, pourable resin (often a coating or deep pour epoxy) that flows into cracks and self-levels. Best for open-grain cracks, bark inclusions and decorative black or coloured fills on furniture.
- Epoxy putty or paste filler – a thick, mouldable 2 part epoxy filler with fillers already blended in. It will not run, so it suits vertical faces, screw holes, edges and structural repairs.
For a broader overview of how different formulations behave, see our epoxy resin guide, which explains coating, casting and deep pour types.
Choosing the right epoxy resin filler for the job
| Defect | Best filler type | Notes |
|---|---|---|
| Hairline checks and small cracks | Thin coating or table top epoxy | Low viscosity wicks deep; apply in several thin passes |
| Loose or dead knots | Thin epoxy, then tinted fill | Stabilises the knot and fills the gap around it |
| Bark inclusions and large voids | Deep pour or casting resin | Pour in layers to manage heat build-up |
| Screw holes, nail holes, edge chips | Two part epoxy wood filler putty | Pack in, overfill slightly, sand flush |
| Exterior joinery and moving joints | Flexible wood epoxy filler | Tolerates seasonal movement better than rigid resin |
As a rule of thumb, thin resins are better at penetrating and bonding, while thick pastes are better at bridging gaps without running.
What you will need
- Two-part epoxy (liquid resin, putty or both, depending on the defects)
- Mixing cups with measurements, stirring sticks and a digital scale if mixing by weight
- Pigment: mica powder, liquid pigment or fine sawdust from the same board
- Low-tack masking tape or packing tape to dam through-cracks
- A heat gun or small torch for popping bubbles
- Card scraper or chisel, random orbit sander and abrasives from 80 to 240 grit or finer
- Nitrile gloves, eye protection and good ventilation
How to fill wood with epoxy: step by step
1. Prepare the defect
Clean out loose bark, dust and soft material with a pick, small chisel or stiff brush, then vacuum. The epoxy needs sound wood to bond to. Make sure the timber is dry – ideally below about 12% moisture content for indoor furniture – as damp wood can cause cloudiness and poor adhesion.
2. Seal the back of through-cracks
If the crack goes right through the board, run packing tape or a strip of hot glue along the underside so the resin cannot drain out. Press it firmly into the grain to stop leaks.
3. Warm the room and the resin
Most epoxies prefer a workshop temperature of roughly 20–25°C. Cold resin is thicker, traps more bubbles and cures slowly. Standing the bottles in warm water for ten minutes before mixing helps it flow into fine cracks.
4. Mix accurately
Follow the manufacturer’s ratio exactly (commonly 1:1 or 2:1 by volume, or a stated weight ratio). Stir slowly for two to three minutes, scraping the sides and bottom of the cup. Poorly mixed epoxy leaves soft, tacky spots that never cure.
5. Tint the epoxy (optional)
Black is the classic choice: a black epoxy resin wood filler hides the depth of a crack and gives a crisp, deliberate look against oak, ash or walnut. Brown tints mimic the wood, while metallic or pearlescent colours turn a defect into a design detail. Use only a small amount of pigment – usually a few percent of the mix – so the cure is not affected. Our guides to mica powder for resin and how to colour epoxy resin cover ratios in more detail.
6. Fill in stages
Pour or press the epoxy into the defect, slightly proud of the surface. In deep cracks the level will drop as resin soaks into the wood and air escapes, so top up after 20–40 minutes. For voids deeper than about 2–3 cm, use a deep pour resin or fill in layers to stop overheating, which can crack the fill or yellow it.
7. Pop bubbles
Pass a heat gun or torch quickly over the surface to release bubbles. Keep it moving – lingering will scorch the wood or the resin. Air rising out of open grain can keep producing bubbles for a while, which is why a thin seal coat first is helpful on porous timbers.
8. Cure, then level
Leave the epoxy to cure fully – typically 24–72 hours depending on the product and temperature. Then remove the excess with a sharp card scraper, a hand plane with a fresh blade or a router sled for big slabs. Sand from 80 grit up through the grades. Any small pinholes revealed at this stage can be filled with a second skim and sanded again.
Epoxy wood filler for screw holes and small repairs
For screw holes, nail holes and small chips, a putty-style two part epoxy wood filler is the quickest option. Knead or mix the two parts until the colour is uniform, press firmly into the hole with a putty knife and leave it slightly proud. Once cured it can be drilled, tapped and screwed into again, which makes it useful for stripped hinge holes. For a perfect colour match on visible areas, mix fine sanding dust from the same timber into a liquid epoxy to make a slurry instead.
Epoxy resin for wood cracks in slabs and tables
On live edge slabs, filling cracks and bark voids is part of the build. Fill the defects before the main flood coat so the top surface is flat and sealed. This is standard practice on a live edge epoxy table, and you can see how it fits into the whole process in our guide on how to make a live edge table. Once filled and sanded, a final table top epoxy coat or oil finish ties everything together.
Common mistakes to avoid
- Filling wet or dirty wood – leads to cloudy fills and poor adhesion.
- Not taping the underside – resin drains out and leaves an empty crack.
- Overloading with pigment – too much colourant can stop epoxy curing properly.
- Pouring too deep at once – thick fills of coating resin can overheat, crack or yellow.
- Sanding too soon – partly cured epoxy clogs paper and tears out.
- Skipping the top-up – fills sink as resin soaks in, leaving a dip after sanding.
Safety
Wear nitrile gloves throughout, as uncured epoxy is a common cause of skin sensitisation. Work in a well-ventilated space and wear eye protection when mixing and when sanding. Cured epoxy dust is still an irritant, so use dust extraction and a dust mask or respirator when sanding. Dispose of leftover mixed resin by letting it cure in the cup before binning it.
Finishing over epoxy-filled wood
Once flush, epoxy filled wood takes most finishes. Hardwax oils and lacquers sit happily over the cured resin, although oil will not soak into the epoxy itself, so the filled areas may look slightly different until the whole surface has a topcoat. For a deep gloss over fills, polish the epoxy through the fine grits – our guide on how to polish epoxy resin explains the process. You can also seal the whole board with an epoxy sealer for wood before any final coat.
Knots on the edge of a board are the trickiest to fill, and Popular Woodworking’s edge-knot repair tip shows how to dam the void with a waxed melamine form, fill it with tinted epoxy, then trim and sand it flush.
Watch it being made
Watch our first light-up resin table being made in the workshop, with dragons and creatures appearing in the resin art, and the colours, pours and finishing shown step by step.
Resin Art Dragons and creatures in resin art table My First Light-Up Resin Table. More builds on the Go Bespoke YouTube channel.
Frequently asked questions
Can you use epoxy resin as a wood filler?
Yes. Liquid epoxy resin is one of the best fillers for cracks, knots and voids because it penetrates deep, bonds strongly and cures with minimal shrinkage. For gaps on vertical surfaces or screw holes, a thicker epoxy putty is easier to use.
How long does epoxy wood filler take to dry?
Most products are touch dry within a few hours, but you should usually wait 24–72 hours before sanding or machining, depending on the formula, the depth of the fill and the room temperature. Fast-setting putties may be sandable in under an hour; check the label.
Is epoxy wood filler stronger than wood?
Cured epoxy is very hard and bonds well, so a properly filled crack or knot is typically as strong as, or stronger than, the surrounding timber in that area. It is not, however, a substitute for structural joinery on load-bearing parts.
Can you screw into epoxy wood filler?
Yes. Once fully cured, a two part epoxy putty can be drilled and screwed into, which makes it a reliable fix for stripped screw holes in doors, hinges and furniture.
How do you make a black epoxy filler for wood?
Add a small amount of black pigment paste or black mica powder to clear mixed epoxy, stirring until the colour is even. A few percent of pigment by volume is usually enough for full opacity.
Have a slab with character?
We regularly fill knots, checks and bark voids as part of bespoke tables and resin furniture built in our London workshop. If you would like a table made with a feature fill or a full river pour, get in touch about a bespoke commission.