UV Resin: How It Works, Pros, Cons & Best Uses
Updated 15 October 2026
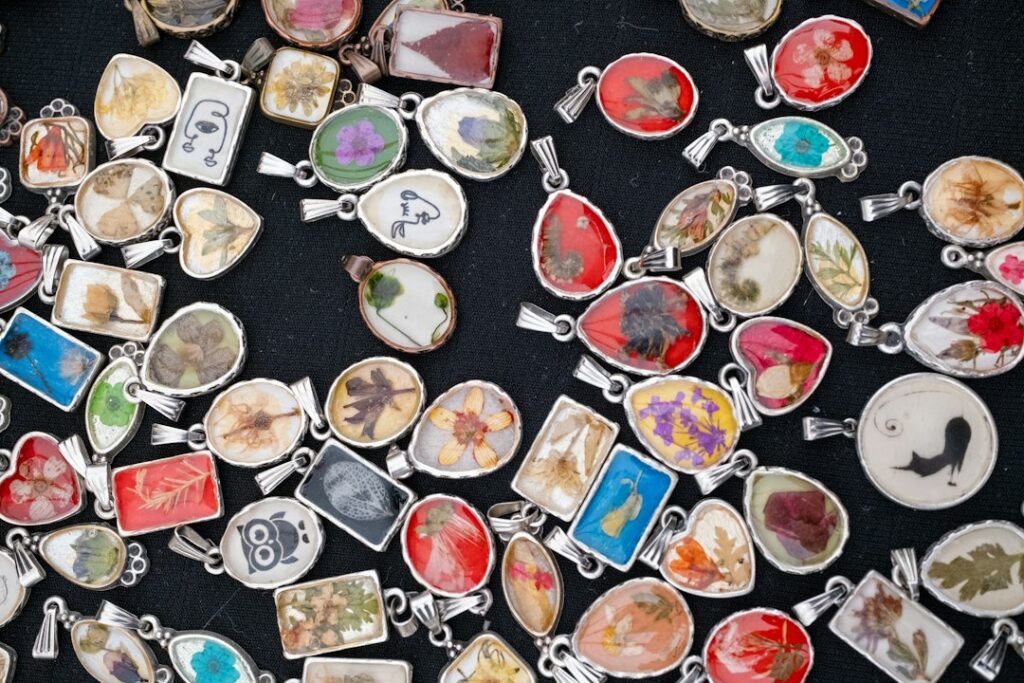
Imagine pouring a drop of clear resin into a pendant mould, shining a small lamp on it and holding a rock-hard, glassy charm two minutes later. That speed is the whole appeal of UV resin. No measuring, no mixing and no waiting overnight – but it comes with real limits on depth, size and safety that every maker should understand before buying a bottle.
This guide is part of our wider epoxy resin hub. Here we explain how ultraviolet-cured resin actually works, how it compares with two-part epoxy, where it shines and where it will let you down.
What is UV resin?
It is a single-component liquid resin – usually an acrylate or methacrylate-based formula – that stays liquid until it is exposed to ultraviolet light. Inside the bottle is a photoinitiator: a compound that absorbs UV energy (typically in the 365–405 nm range) and kicks off a rapid chain reaction, linking the molecules into a solid plastic. Keep it in the dark and it stays runny; put it under a lamp or in strong sunlight and it hardens in seconds to minutes.
Because it is a different chemistry from traditional epoxy, the terms can be confusing. “UV epoxy resin” and “UV cure epoxy resin” are common search phrases and product names, but most hobby UV-curing resins are not true epoxies. If you want a refresher on the different resin families, our explainer on what resin is covers the basics.
How the curing process works
- Apply a thin layer. Pour or dab resin into a mould, bezel or onto a surface – ideally no more than about 2–3 mm per layer.
- Expose to UV light. A UV nail lamp or dedicated curing lamp (often 36–54 W for hobby use) or a handheld UV torch delivers the right wavelength. Sunlight works too but is slower and less consistent.
- Cure time. Thin layers typically set in 30 seconds to 3 minutes under a good lamp. Flip pieces and cure the back side too, as moulds can shade the resin.
- Build in layers. For deeper pieces, cure one layer before adding the next. This also lets you suspend inclusions at different depths.
- Deal with surface tack. Oxygen can inhibit the very top surface, leaving it slightly sticky. Extra curing time, a thin “sealer” layer, or wiping with isopropyl alcohol usually solves it.
UV resin vs two-part epoxy
| Feature | UV-curing resin | Two-part epoxy resin |
|---|---|---|
| Mixing | None – ready to use | Resin and hardener measured by ratio |
| Cure time | Seconds to minutes under UV | Hours to days |
| Maximum depth per layer | Typically 2–3 mm, sometimes up to around 5–6 mm with special formulas | From a few mm (coating) up to 50 mm+ (deep pour) |
| Best project size | Small: jewellery, charms, repairs | Small to very large: coasters to tables |
| Cost per volume | Typically much higher | Typically lower, especially in bulk |
| Pigments | Small amounts only; heavy colour blocks the light | Tolerates more pigment |
| Bubbles | Few, as no mixing | Introduced in mixing; need degassing or heat |
| Heat during cure | Can get warm in thicker layers | Exothermic; risk of overheating in thick pours |
In short, use UV-curing resin for small, quick, detailed work and two-part epoxy for anything larger, thicker or more cost-sensitive. A river table or a thick coaster set needs proper deep pour epoxy, not a light-cured product.
Best uses
- Jewellery and charms: pendants, earrings, rings and bezels where speed and clarity matter.
- Doming: adding a glossy, raised dome over stickers, badges, keyrings and small prints.
- Quick fixes: sealing small chips, filling pinholes in a cured epoxy piece, or fixing a bubble near the surface before polishing.
- Layered miniatures: building tiny scenes layer by layer, curing each one so inclusions stay put.
- Sealing small botanicals: coating dried petals to lock in colour before embedding – our guide to preserving flowers in resin explains drying first.
- Silicone mould work: small shapes in shallow resin molds, especially clear or semi-transparent ones that let light through.
Limitations to know before you buy
- Depth: UV light can’t penetrate far, especially through tinted resin. Thick single pours often stay soft or sticky inside.
- Opaque moulds and pigments: black silicone, heavy mica or opaque inclusions shade the resin. Use light colouring – a tiny pinch of mica powder or a drop of transparent dye – and cure from several angles.
- Cost: per millilitre it is typically several times the price of two-part epoxy, so it is uneconomical for anything bigger than a few centimetres.
- Yellowing: like most resins, cured pieces can yellow over time in sunlight. Don’t confuse UV-curing with UV-resistant – a resin that cures under UV is not automatically protected from it. Our guide to UV-resistant epoxy resin explains the difference.
- Flexibility: some formulas are hard and brittle; others are labelled “soft” or “flexible” for bookmarks and bendy pieces. Check before buying.
Is UV resin toxic? Safety basics
Uncured acrylate resins are skin and eye irritants and well-known sensitisers – repeated skin contact can cause allergic dermatitis that gets worse with each exposure. Once fully cured, the plastic is generally considered inert, but under-cured pieces may still be tacky and irritating.
- Wear nitrile gloves (not latex) and avoid touching your face.
- Work in a ventilated room; the odour can be strong with some formulas.
- Protect your eyes: don’t stare into UV lamps or torches, and wear UV-blocking glasses with handheld lights.
- Wipe spills with paper towels and isopropyl alcohol, then cure the waste in the sun before disposal. Don’t pour liquid resin down the drain.
- Store bottles in a dark, cool place and keep away from children and pets.
- Cured pieces aren’t automatically food safe – don’t use them for anything that touches food or drink unless the product’s data sheet says so.
Choosing a UV resin kit
Kits typically bundle a bottle or two of resin, a small lamp and a few moulds. Rather than hunting for a single “best” product, judge each by:
- Viscosity: “hard” thin resin for moulds and bezels; thicker “doming” resin for raised tops.
- Clarity and yellowing resistance – look for UV stabilisers listed in the description.
- Stated cure depth and wavelength – match the resin to your lamp (365 nm, 395–405 nm or dual-wavelength).
- Lamp quality: a wider lamp with even LED spread cures more reliably than a small torch.
- Safety data sheet availability – reputable sellers publish one.
- Value per ml: small bottles add up quickly; compare by volume.
Typical costs: a starter set with lamp and resin is typically around £15–£40 / $20–$50, with refill bottles costing more per ml than an equivalent two-part epoxy resin kit.
Common mistakes
- Pouring too deep in one go and ending up with a soft centre.
- Adding too much pigment so the light can’t reach the bottom.
- Curing only from the top when the mould shades the sides.
- Assuming tacky means faulty – often it just needs more cure or a quick wipe.
For the chemistry behind the instant set, Wikipedia’s article on UV curing explains how photoinitiators absorb ultraviolet light to harden the resin, and why cure speed and depth depend on how much light reaches each layer.
Watch it being made
Watch our first light-up resin table being made in the workshop, with dragons and creatures appearing in the resin art, and the colours, pours and finishing shown step by step.
Resin Art Dragons and creatures in resin art table My First Light-Up Resin Table. More builds on the Go Bespoke YouTube channel.
Frequently asked questions
Is UV resin the same as epoxy?
No. Most hobby UV-curing resins are acrylate-based and cure under light, while epoxy is a two-part resin that cures by chemical reaction with a hardener. Products labelled “UV epoxy” are sometimes hybrids, so check the description.
Can you cure ultraviolet resin without a lamp?
Yes, direct sunlight will cure thin layers, but it is slower and less predictable, especially on cloudy days or in winter in the UK. A lamp gives more consistent results.
How long does UV cure resin take to harden?
Under a decent lamp, thin layers typically set in 30 seconds to 3 minutes. Thicker layers, pigmented resin or weaker lights take longer, and a short extra cure helps remove surface tack.
Why is my resin still sticky after curing?
Usually because the layer was too thick, the light was too weak or the wrong wavelength, or oxygen inhibited the surface. Cure longer, flip the piece, or wipe with isopropyl alcohol.
Is cured resin safe to wear as jewellery?
Fully cured pieces are generally fine for jewellery, but under-cured resin can irritate skin. Cure thoroughly from all sides and stop wearing a piece if it causes a reaction.
If you’re ready to move beyond small pieces, our epoxy resin for beginners guide is the next step – and you can see larger resin builds on the Go Bespoke YouTube channel.