Wood Epoxy: Choosing the Right Epoxy for Woodworking
Updated 15 October 2026
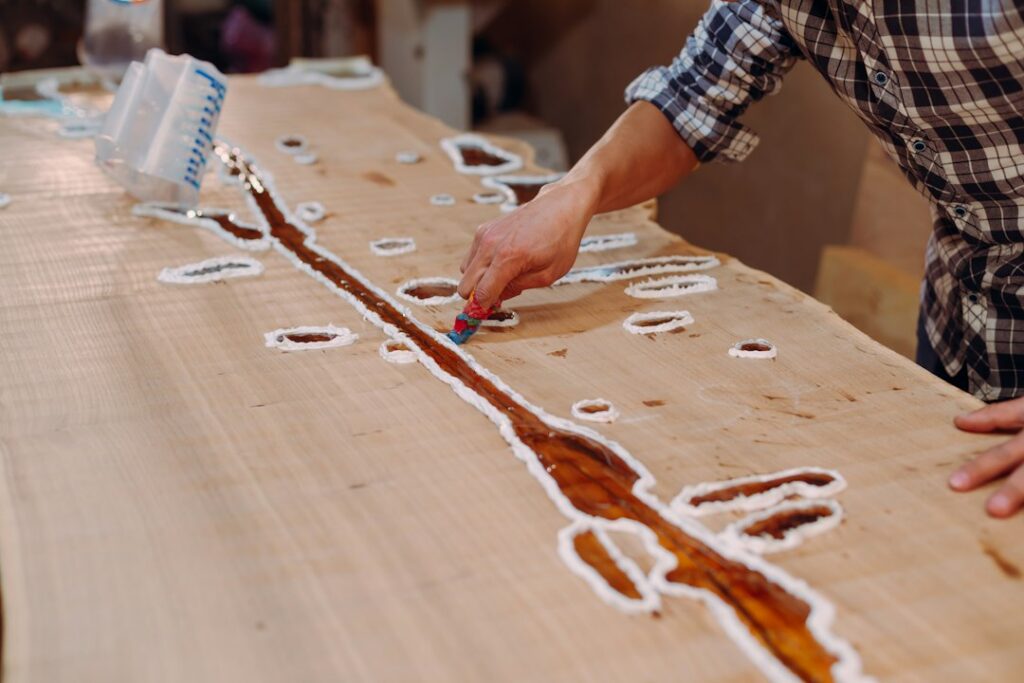
Walk into any woodworking shop and you will find epoxy doing half a dozen different jobs: sealing grain, filling knots, gluing joints, stabilising punky timber, flood-coating tabletops and pouring rivers several centimetres deep. The catch is that no single product does all of those well. Choosing the right wood epoxy means matching the resin’s viscosity, cure speed and depth limit to the job in front of you, and preparing the timber so the two materials bond and stay bonded. This guide breaks down the main categories, how to choose between them and the mistakes that cause most failures.
If you want the chemistry behind it all, our epoxy resin hub explains how resin and hardener cure and how formulations differ. Here we focus on epoxy for wood specifically.
Why use epoxy in woodworking?
Epoxy bonds strongly to wood, cures with very little shrinkage, fills gaps without needing clamping pressure, and once fully cured it is water-resistant. That makes it ideal for:
- Filling cracks, knots, worm holes and bark inclusions.
- Sealing porous grain before a top coat.
- Coating tabletops and bar tops with a hard, glossy finish.
- Casting rivers, voids and decorative inlays.
- Stabilising soft, spalted or punky timber so it can be machined.
- Gluing oily woods, gap-filling joints and boat-style repairs.
Choosing wood epoxy by job
| Job | Resin type | Typical pour per layer | Notes |
|---|---|---|---|
| Seal coat | Thin coating epoxy, sometimes slightly warmed | Very thin, brushed or scraped on | Stops bubbles rising from grain during later coats |
| Flood / top coat | Table top or bar top epoxy | Around 3 mm (roughly 1/8 in), self-levelling | Fast-ish cure; high gloss; can be recoated |
| Small cracks and knots | Low-viscosity or wood-filler epoxy | Fill in thin passes | Can be tinted black or coloured |
| Rivers and deep voids | Deep pour / casting epoxy | Several centimetres, per label | Slow cure (days); low heat build-up |
| Stabilising soft wood | Very thin penetrating epoxy | Soaked in or brushed until saturated | Strengthens fibres before turning or machining |
| Structural glue-ups | Thickened laminating epoxy | Thin glue line or filleted | Gap-filling; good for oily woods |
Coating epoxy
Coating, or table top, epoxy is relatively thick and self-levelling. It is designed for thin layers, around 3 mm at a time, and cures within a day or so to a hard, glossy surface. It is perfect for tops and bar counters but will overheat and crack if poured deep. The table top epoxy guide covers application in detail.
Deep pour epoxy
Deep pour formulas are thin, slow-curing and generate heat gradually, so they can be poured several centimetres thick in one go, which is exactly what river tables and big voids need. They take several days to cure fully and are generally less scratch-resistant on the surface, so many makers finish a deep pour with a coating epoxy or a hardwax oil. Read more in our deep pour epoxy guide.
Wood filler epoxy
For cracks, checks and knots, a low-viscosity epoxy wicks into the gaps. Thickened versions (or epoxy mixed with fine sawdust) suit larger holes. See epoxy wood filler for mixing, tinting and sanding techniques.
Clear epoxy for wood: what to look for
Clarity matters when you want to see the timber through the resin. Look for:
- Low colour – a water-clear resin that does not tint pale woods.
- UV stabilisers or HALS – these slow yellowing; see UV-resistant epoxy resin. No epoxy is completely yellowing-proof in direct sun.
- Good bubble release – thinner resins and slower cures let air escape.
- A clear technical data sheet – with mix ratio, working time, maximum depth, recoat window and full cure time.
- Low VOC / solvent-free – most quality wood resins are 100% solids, which means less odour and shrinkage.
Rather than relying on brand rankings, choose the product category that fits the job and check its data sheet against your project’s depth, temperature and timescale.
Preparing wood for epoxy
Most epoxy failures come from the timber, not the resin.
Moisture content
Wood should be dry, ideally around 8–12% moisture content for indoor furniture. Wet timber releases moisture as it dries, causing cloudiness, poor adhesion and cracking at the resin line. A pin moisture meter is a cheap and worthwhile investment. Our live edge wood guide explains drying and acclimatising slabs.
Cleaning and sanding
- Remove loose bark and soft cambium with a wire brush.
- Sand to around 80–120 grit for surfaces that will be coated; this gives a mechanical key.
- Vacuum and wipe away dust. On oily woods such as teak or rosewood, a wipe with acetone just before application improves bonding.
Seal before you pour
Wood is full of air. When warm resin covers it, that air expands and rises as bubbles. A thin seal coat brushed or scraped on and allowed to tack up locks the air in place before the main pour. The epoxy sealer for wood guide covers the process step by step.
Working conditions and safety
- Temperature – most wood epoxy resins are designed for about 20–25°C. Cold resin is thick and bubbly; hot conditions shorten working time.
- Measuring – follow the stated ratio exactly, by weight or volume as specified. Do not add extra hardener to “speed it up”; it will not cure properly.
- Mixing – scrape the sides and bottom; mix for the full recommended time, then transfer to a clean container if the label suggests it.
- Protection – nitrile gloves, eye protection and good ventilation. Use a respirator with organic vapour filters when sanding cured epoxy or working in enclosed spaces; sanding dust from both wood and resin is an irritant.
Common mistakes with wood and epoxy
- Pouring coating epoxy too deep, leading to overheating, cracks or yellowing.
- Skipping the seal coat and finding bubbles in the finished top.
- Using damp timber, which clouds the resin and weakens the bond.
- Leaky forms: deep pour resin finds every gap, so seal moulds carefully.
- Sanding or demoulding too early, before full cure.
- Over-pigmenting, which can affect cure; check the dye or mica manufacturer’s guidance.
Kits, quantities and costs
Epoxy resin kits for wood come in sizes from small 500 ml repair packs to 20 litre-plus deep pour kits for tables. As a broad guide, coating epoxy typically costs around £20–£45 ($25–$55) per litre and deep pour resin is similar or slightly more, falling with bulk sizes. A river table can need anywhere from a few litres to well over 20, so calculate before you buy. The epoxy resin kit guide explains what is usually included, and epoxy resin for tables helps you plan a full table project.
For the technical side of why surface preparation and moisture content matter so much when epoxy meets timber, the Wood Handbook’s chapter on adhesive bonding of wood, published by the US Forest Products Laboratory, covers epoxies and other adhesives in depth.
Watch it being made
Watch our first light-up resin table being made in the workshop, with dragons and creatures appearing in the resin art, and the colours, pours and finishing shown step by step.
Resin Art Dragons and creatures in resin art table My First Light-Up Resin Table. More builds on the Go Bespoke YouTube channel.
Frequently asked questions
What is the best epoxy for wood projects?
It depends on the job: coating epoxy for thin top coats, deep pour epoxy for rivers and voids, low-viscosity epoxy for cracks and stabilising, and thickened epoxy for glue-ups. Choose by depth and purpose rather than brand.
Can you use wood epoxy outdoors?
Epoxy can be used outside, but UV light yellows and degrades it over time. Choose a UV-stabilised product and protect it with a UV-resistant varnish or topcoat, and expect more maintenance than indoors.
Does epoxy resin for wood need a sealer coat?
For coatings and pours over open-grained or porous timber, yes. A thin seal coat prevents air bubbles rising out of the wood into the main pour.
How long does epoxy take to cure on wood?
Coating epoxies are often touch-dry within a day and fully cured in about a week. Deep pour formulas take several days to harden and longer to reach full cure, depending on thickness and temperature.
Can you stain wood before applying clear epoxy for wood?
Yes, but use a compatible stain and let it dry fully, often 72 hours for oil-based stains. Water-based dyes are generally safer under epoxy. Test on an offcut first.
Planning a resin and wood piece but would rather leave it to a workshop? Get in touch about a bespoke commission, or learn the full process in how to make a resin table.