How to Epoxy a Table Top: Flood Coat Step by Step
A flood coat of epoxy can turn a tired dining table, a reclaimed-wood bar or a home-made coffee table into a deep, glass-like surface that shrugs off spills. Learning how to epoxy a table top is mostly about preparation and patience: a level table, a sealed surface, accurately mixed resin and a dust-free room matter far more than any special technique. This step-by-step guide covers coating an existing table, from repairs and seal coat to edges, drips and the final cure.
This page is about coating a finished table. For the basics of mixing and pouring any epoxy, see our main guide to how to pour epoxy resin, and for choosing the product itself, our table top epoxy guide covers what to buy.
What you will need
Before you start, gather everything so you are not hunting for tools once the resin is mixed. The kit list for how to epoxy a table top is short:
- Table top (coating) epoxy, enough for a seal coat plus a flood coat
- Graduated mixing buckets, flat-ended stirrers and a timer
- A plastic spreader or notched squeegee and a foam brush
- Spirit level, shims and blocks to raise the table
- Painter’s tape, plastic sheeting and cups or blocks to sit the table on
- A heat gun or small torch for bubbles
- Sandpaper (120–220 grit), a vacuum and lint-free cloths
- Nitrile gloves, eye protection and, in a small room, a respirator with organic vapour cartridges
How much epoxy for a table top?
A standard flood coat is about 3 mm (1/8 inch) thick, because most coating epoxies self-level at roughly that depth. Each square metre at 3 mm needs about 3 litres of mixed resin. For example, a 1.8 m × 0.9 m dining table is 1.62 m², so a 3 mm flood coat needs roughly 4.9 litres, plus about 10–15% for edges and drips, so around 5.5 litres. Add a little more for the seal coat. Our epoxy calculator works this out for any size.
Step 1: Prepare and repair the table
Epoxy magnifies everything underneath it, so fix problems first.
- Remove wax, polish and silicone-based furniture sprays with a suitable degreaser, then sand. Glossy varnish should be keyed with 120–180 grit; oily or flaking finishes are better stripped back to bare wood.
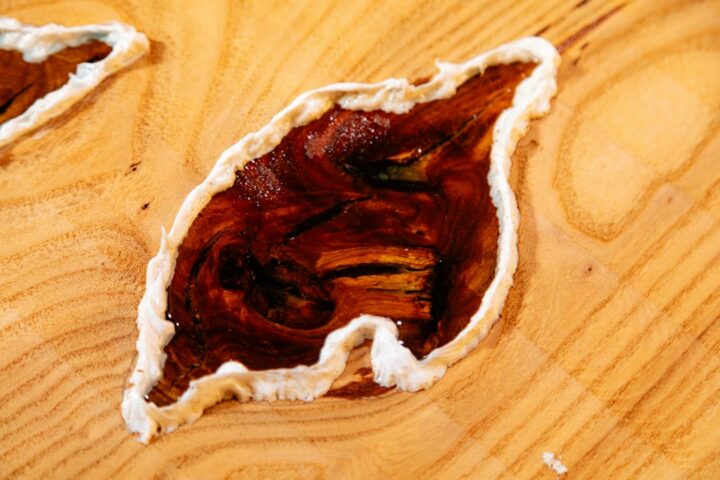
- Fill knots, cracks and holes. Small defects can be filled with an epoxy wood filler, and soft or rotten areas on old or outdoor timber need consolidating with wood rot repair epoxy before coating.
- Make sure the timber is dry and at room temperature. Coating damp wood traps moisture and can cause clouding and bubbles.
- Vacuum and wipe off all dust.
Step 2: Level the table and protect the area
Epoxy flows to the lowest point, so an unlevel table gives you a thin side and a thick side. Raise the top on blocks or cups so drips can fall clear, then check it with a spirit level in both directions and across the diagonals, adjusting with shims. Cover the floor with plastic sheeting. If you only want to coat the top and not the edges, tape the underside edge so drips can be peeled away later.
Set up the room at around 21–25°C, with the resin bottles warmed to the same temperature. Turn off fans and close doors to keep dust down.
Step 3: Apply a seal coat
Wood is full of air. When warm epoxy sits on it, that air rises out of the grain and leaves bubbles in the finish. A seal coat stops this:
- Mix a small batch accurately and stir slowly for the time stated, scraping the sides and bottom.
- Brush or spread a thin coat over the top and edges, working it into the grain and any open pores.
- Pass a heat gun or torch over it to pop bubbles.
- Leave it until tacky, often 3–6 hours, so the flood coat bonds chemically. If it cures fully first, lightly sand it before continuing.
Step 4: Pour the flood coat
- Mix the full flood coat volume in one or two batches, measuring precisely. Do not rush the stir; streaks mean soft spots later.
- Pour in the centre of the table, then spread outwards with the spreader, leaving a slight overhang so resin flows over the edges.
- Let it self-level. Use a gloved hand or foam brush to guide resin over any bare edges and corners.
- After 10–15 minutes, pass the heat gun or torch quickly over the surface, holding it moving and well away from the resin, to release bubbles. Repeat once or twice during the first hour.
- Check for dust or hairs and lift them with a cocktail stick.
- Cover with a clean box or sheet tented above the surface, not touching it.
How to epoxy a table top and edges: dealing with drips
If you are coating the edges, drips will form underneath. About 30–60 minutes after pouring, run a gloved finger or plastic spreader along the underside to remove the gathering drips, and repeat once more as the resin thickens. If you taped the underside, simply peel the tape off once the resin is firm but not fully hard. Any hardened drips can be sanded flush later.
For rounded or live edges, brush resin on with a foam brush to keep the coat even. Sharp square edges tend to pull resin away and look thin, so slightly rounding them with sandpaper before coating helps.
Step 5: Cure and recoat
Most table top epoxies are touch-dry in 12–24 hours, can take a second coat within the recoat window stated on the label, and reach full cure in about a week. If you miss the recoat window, sand the surface evenly with 220–320 grit until uniformly dull, clean it and pour again. Our guide to how long epoxy takes to dry explains how temperature changes these timings.
For a sense of how other makers approach the same process, Hunker’s article on making an epoxy resin table top shows a simple decorative version with embedded items under the coat.
Common mistakes when pouring epoxy on a table top
- No seal coat: bubbles keep appearing as the wood outgasses.
- Table not level: resin runs off one side and leaves thin patches.
- Cold room: slow, cloudy or soft cure, often with a greasy film.
- Too deep a pour: coating epoxy poured well beyond its self-levelling depth can overheat or ripple.
- Overheating with a torch: scorching, yellowing or craters; keep the flame moving.
- Dust: sanding in the same room on the day of the pour.
Safety
Uncured epoxy is a skin sensitiser, and allergic contact dermatitis is a well-documented problem among people who use it regularly. Wear nitrile gloves and long sleeves, change gloves if resin gets on them and wash skin with soap and water, never solvents. The HSE research report on skin sensitisation from epoxy resin recommends protective clothing and careful mixing and handling, which applies just as much to a home workshop. Ventilate the room and keep heat guns and torches away from solvents and plastic sheeting.
Caring for an epoxy table top
Once you know how to epoxy a table top, looking after it is simple. Use mats under hot dishes, wipe spills with a damp cloth and avoid abrasive cleaners. Light scratches can be buffed out once the resin is fully cured; see our guide to polishing epoxy resin.
Watch it being made
See one of our tables come together in the workshop: a nebula resin top with fibre optic stars, from the first pour to the lights going on.
Resin art nebula resin table with fibre optic art. More builds on the Go Bespoke YouTube channel.
Frequently asked questions
How do you epoxy a table top for beginners?
Clean and sand the table, level it, apply a thin seal coat, then pour a 3 mm flood coat and spread it to the edges. Pop bubbles with a heat gun, cover it from dust and leave it to cure in a warm room.
How thick should epoxy be on a table top?
About 3 mm per flood coat for most table top epoxies. For a thicker finish, apply several coats rather than one deep pour.
Can you pour epoxy over an old table finish?
Over sound, sanded varnish or lacquer, usually yes. Oiled, waxed or flaking finishes should be removed first so the epoxy bonds.
How do you epoxy the edges of a table?
Let the flood coat run over the edges and spread it with a gloved hand or foam brush, then wipe drips from the underside once or twice during the first hour as the resin thickens.
How long before I can use an epoxy table top?
Light use is often possible after 24–72 hours, but wait for full cure, typically about a week, before hot items or heavy use.
Would you rather have a resin table made for you? Get in touch about a bespoke commission and we will build a wood and resin table to your size and style.