Epoxy Countertops: Complete DIY Guide, Costs & Ideas
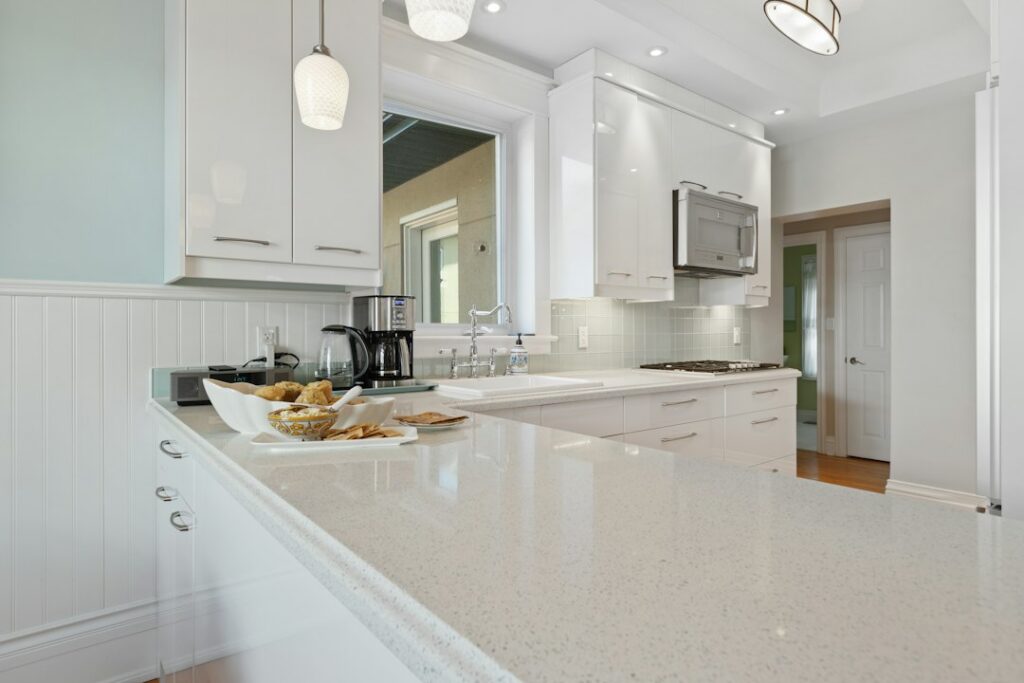
Few kitchen upgrades create as much visual impact for the money as epoxy countertops. A few litres of resin, some pigment and a weekend of careful work can turn tired laminate, plain concrete or worn wood into a seamless, glossy surface that looks like marble, granite, stone or something entirely your own. But epoxy is not magic: it scratches, it can yellow, and a rushed pour can leave drips, craters and soft spots that are hard to fix. This guide explains what epoxy countertops are, how they compare with stone and laminate, what they typically cost, how a DIY installation works and how to keep one looking good for years.
What are epoxy countertops?
An epoxy countertop is an existing or new worktop substrate – usually laminate, MDF or plywood, concrete or solid wood – coated with a layer of two-part epoxy resin. The resin self-levels into a smooth, glassy film, typically around 3 mm (1/8 inch) thick per flood coat. Colour comes from pigments, mica powders, metallic additives or embedded materials, and the finished surface is seamless with no grout lines.
There are three broad ways people use countertop epoxy:
- Resurfacing – coating an existing countertop in place to give it a new look without replacing it.
- Clear coating – sealing wood, concrete or decorative inlays (coins, bottle caps, maps) under a clear protective layer, much like a bar top.
- Full decorative builds – new substrates with marble, granite or metallic effects, or wood and resin combinations similar to river tables.
If you are new to the material itself, our guide to epoxy resin types and uses explains how coating resins differ from deep pour and casting resins.
Pros and cons of epoxy countertops
| Pros | Cons |
|---|---|
| Seamless, glossy finish with no joints | Scratches more easily than granite or quartz |
| Almost unlimited colours and effects | Not heat-proof; hot pans can mark or soften it |
| Can be applied over existing worktops | Can amber or yellow with sunlight over time |
| Waterproof and non-porous once cured | Unforgiving installation; mistakes are hard to undo |
| Typically far cheaper than stone as DIY | Messy job; kitchen out of use for several days |
| Repairable by sanding and recoating | Strong odour and skin-sensitisation risk during application |
For many homeowners, the deciding factors are budget and appearance. Epoxy can mimic expensive stone at a fraction of the cost, but it rewards people who are happy to use trivets and chopping boards.
Epoxy countertops vs other worktop materials
| Material | Typical cost (installed) | Heat resistance | Scratch resistance | DIY friendly? |
|---|---|---|---|---|
| Epoxy over existing top | Low (DIY) to medium (pro) | Low–moderate | Moderate | Yes, with care |
| Laminate | Low | Low | Moderate | Yes |
| Solid wood | Medium | Low | Low | Yes |
| Granite | High | High | High | No |
| Quartz composite | High | Moderate | High | No |
| Concrete | Medium–high | High | Moderate | Possible, heavy work |
How much do epoxy countertops cost?
Epoxy countertop cost depends on area, finish complexity, the state of the substrate and whether you hire an installer. As typical guide ranges:
- DIY materials – typically around £15–£45 per square metre for coating epoxy, primer and pigment on a standard kitchen, or roughly $2–$5 per sq ft. Metallic and multi-colour finishes use more product.
- DIY all-in – once you add tools, sandpaper, tape, plastic sheeting, a heat gun and respirator cartridges, a small to medium kitchen typically lands in the low hundreds of pounds or dollars.
- Professional epoxy countertop installation cost – typically £80–£200 per square metre in the UK, or roughly $50–$100+ per sq ft in the US, depending on region and design.
To work out how much resin you need, measure the surface area including edges and use our guide on how much epoxy you need. As a rough rule, one litre of coating epoxy covers about 0.33 square metres at 3 mm thick, and you should add 10–20% for edges and drips.
Choosing a countertop epoxy
Not every resin is suitable for worktops. When choosing a countertop epoxy, look for:
- A coating or table top formulation – designed for layers of about 3–6 mm, which self-level and cure hard. Deep pour resins are too slow and soft for this.
- UV stabilisers – important if the kitchen gets direct sunlight; read our notes on UV resistant epoxy resin.
- Food-contact compliance once cured – check the data sheet if you will prepare food directly on it (although a chopping board is always recommended).
- Heat resistance figures – most epoxies begin to soften well below the temperature of a hot pan, so treat higher ratings as a bonus, not permission.
- Self-levelling and low odour – helpful in a home that is lived in during the work.
Resins sold for bars and tables are often well suited; our bar top epoxy and table top epoxy guides explain what to look for in those formulations. An all-in-one epoxy resin kit can be convenient for a first project, as long as the quantity matches your area.
How to install epoxy countertops: DIY overview
A full step-by-step is beyond a single section, but the process follows the same basic stages whatever the finish. If you have never poured resin before, practise on an offcut first and read our guide on how to pour epoxy resin.
1. Prepare the room
Remove everything from the worktops, take off taps if possible and mask sinks, hobs, walls and cabinet fronts. Cover the floor and lower cabinets with plastic sheeting, because epoxy drips off the edges. Aim for a stable room temperature of around 21–27°C and good ventilation.
2. Prepare the substrate
Clean and degrease thoroughly, then scuff-sand the surface (around 80–120 grit on laminate) so the coating can grip. Repair chips and seams with filler and sand flush. Wood and concrete need sealing first to stop air bubbles rising out of the pores.
3. Prime
Apply a primer or thin seal coat of epoxy, often tinted to the base colour. This hides the old pattern, seals the surface and gives the flood coat something even to bond to. Let it reach the stage recommended by the manufacturer – often tacky or lightly cured – before continuing.
4. Mix and pour the flood coat
Measure resin and hardener exactly by the stated ratio, mix slowly for several minutes, then divide into separate cups for each colour. Pour onto the surface, spread with a notched trowel or spreader, and use the edges to let excess run off. Work section by section, keeping a wet edge.
5. Create the effect
For marble looks, drizzle white and grey veins and blend with a heat gun, brush or feather. For metallic epoxy effects, move pigment-loaded resin around with a heat gun and spreader to create depth. Keep a photo of the finish you are aiming for nearby, and do not overwork it.
6. Remove bubbles and dust
Pass a heat gun or torch quickly over the surface to release bubbles, then cover the area with a tent of plastic to keep dust off. Scrape drips from the underside of edges every 15–30 minutes during the first hour or two.
7. Cure
Most countertop epoxies are touch dry within about 24 hours, can take light use after around 72 hours, and reach full hardness after roughly 7 days. Keep the room warm and avoid heavy items and water until fully cured.
8. Optional topcoat or polish
A second clear coat adds depth and fixes minor flaws. Some installers add a polyurethane or similar topcoat for extra scratch and UV resistance. Small imperfections in the cured surface can be wet-sanded and buffed – see how to polish epoxy resin.
Safety when installing countertop epoxy
- Wear nitrile gloves, long sleeves and eye protection – uncured epoxy can cause allergic skin reactions.
- Ventilate well and wear a respirator with organic vapour cartridges in enclosed kitchens.
- Keep children and pets out of the room until the surface has cured.
- Turn off and isolate gas hobs and pilot lights if using a torch, and keep solvents away from flames.
- Let leftover mixed resin cure in the cup before disposal; a large mass can get very hot.
Common mistakes to avoid
- Skipping the primer – old patterns show through and bubbles rise from porous substrates.
- Working in the cold – leads to slow, cloudy or tacky cures and more bubbles.
- Mis-measuring the ratio – leaves soft spots that never harden.
- Not enough resin – running out halfway causes visible lines; buy extra.
- Forgetting edge drips – they harden into stalactites under the overhang.
- Using it too soon – heavy objects and water before full cure can leave marks.
Epoxy countertop styles and ideas
The design range is one of the biggest reasons people choose epoxy counters. Popular styles include:
- White marble – white base with soft grey and gold veining; the most requested look.
- Black granite or galaxy – dark base with metallic flecks or pearlescent swirls.
- Metallic – liquid metal effects in copper, silver, gold or bronze.
- Concrete look – grey tones with subtle mottling for an industrial kitchen.
- Clear over wood – butcher block or reclaimed timber sealed under a glossy coat.
- Wood and resin river – coloured or clear resin channels running between wood sections.
- Inlaid – coins, bottle caps, shells or maps under clear resin, especially for bars and utility areas.
Colour is controlled by pigment type and amount; our guides on how to colour epoxy resin and on mica powders explain how to get vivid, even tones without affecting the cure.
Durability and lifespan
A well-installed epoxy countertop can last many years – often a decade or more – with care. Its weak points are heat, sharp knives and UV. Most damage is cosmetic and can be repaired by sanding the affected area and applying a fresh clear coat, which is a real advantage over stone, where chips are hard to hide.
Caring for epoxy counters
- Always use trivets for hot pans and dishes.
- Cut on chopping boards, never directly on the resin.
- Clean with warm water and mild washing-up liquid; avoid abrasive pads and harsh solvents.
- Wipe up strong dyes (turmeric, red wine, hair dye) promptly.
- Restore gloss occasionally with a non-abrasive polish suitable for epoxy.
DIY or hire a professional?
DIY makes sense if you are working on a small, simple layout, are happy with an imperfect first attempt and can leave the kitchen out of action for several days. Consider a professional if you have a large or L-shaped kitchen, undermount sinks, a complex marble design, or you need a guaranteed finish for a sale or rental. Either way, get the substrate checked – epoxy will not fix a worktop that is swollen, loose or rotten.
Related surfaces
Many of the same techniques carry over to floors. If you are considering coating a garage, utility or basement floor as well, start with our epoxy floor guide, which covers prep, kits and when to hire a pro.
If your worktop will be used for food preparation, the Food Standards Agency’s guidance on food contact materials regulations sets out the UK rules for surfaces that touch food, which is worth checking against your resin’s data sheet.
Watch it being made
See one of our tables come together in the workshop: a nebula resin top with fibre optic stars, from the first pour to the lights going on.
Resin art nebula resin table with fibre optic art. More builds on the Go Bespoke YouTube channel.
Frequently asked questions
Are epoxy countertops durable?
Yes, for everyday use. Cured epoxy is hard, waterproof and stain resistant, but it is softer than stone, so it can scratch and is sensitive to heat. With trivets and chopping boards, they typically last many years.
How much does an epoxy countertop cost?
A DIY epoxy countertop typically costs a few pounds or dollars per square foot in materials, while professional installation typically runs from about £80–£200 per square metre in the UK or $50–$100+ per sq ft in the US, depending on design and region.
Can you put epoxy over laminate countertops?
Yes. Laminate is one of the most common substrates. Clean, degrease and sand it, repair any damage, apply a primer coat, then pour the flood coat.
Can you put hot pans on epoxy countertops?
No. Most epoxies can soften, mark or discolour under the direct heat of pans fresh off the hob. Always use trivets or heat mats.
Are epoxy countertops food safe?
Some countertop epoxy products state food-contact compliance once fully cured. Check the manufacturer’s data sheet, allow the full cure time, and use a chopping board for food preparation.
Do epoxy countertops turn yellow?
Over time, most epoxies amber with UV exposure. Choosing a UV stabilised resin, adding a UV-resistant topcoat and limiting direct sunlight slow the process considerably.
Watch resin projects in action
Seeing a pour in real time makes the techniques far easier to understand. Watch our resin builds and finishing tips on the Go Bespoke YouTube channel.
All guides in this section
- Bar Top Epoxy: Choosing and Pouring the Perfect FinishBar top epoxy guide: choose the best bar top epoxy, work out quantities, then seal, pour and cure a glossy, durable epoxy…
- Best Epoxy Countertop Kit: Honest Comparison & TipsChoosing an epoxy countertop kit: coverage per kit, colour packs, heat resistance, included tools, step-by-step use and typical costs for DIY worktops.