Bar Top Epoxy: Choosing and Pouring the Perfect Finish
Updated 16 October 2026
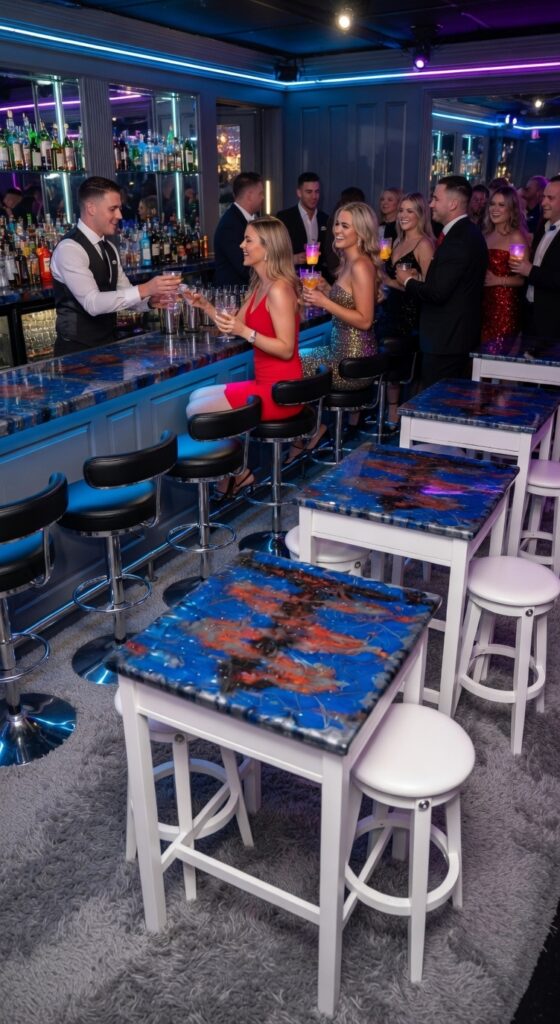
Bar top epoxy gives a counter, bar or table a thick, glossy, liquid-glass finish that shrugs off spilled drinks and wet glasses. A single flood coat is around 3 mm deep, far thicker than any varnish, and it self-levels into a mirror surface that can encase coins, bottle caps, photos or a live edge slab beneath it. Done well, an epoxy bar top is one of the most hard-wearing and eye-catching finishes you can put on timber. Done badly, it is a sticky, wavy, bubbly mess that is difficult to fix.
This guide covers how to choose the best bar top epoxy, how to prepare and pour it, and the ideas and mistakes worth knowing before you start. For general mixing and pouring technique across all resin types, see our main guide to how to pour epoxy resin.
What is bar top epoxy?
Bar top epoxy (also sold as table top or coating epoxy) is a two-part resin formulated for thin, self-levelling coats rather than thick castings. Compared with a deep pour resin it has:
- Higher viscosity, so it holds a 3 mm layer and flows to a level finish without running away.
- A faster cure, usually touch-dry in 12–24 hours and ready for light use in about 72 hours.
- A harder surface, more resistant to scratches and heat marks than casting resin.
- A simple 1:1 mix ratio by volume in most products, which makes it forgiving for first-timers.
The key limitation is depth. Most bar top epoxies should not be poured much deeper than about 3–6 mm per coat. For filling a deep void, a river or encasing thick objects, use a casting resin; our deep pour epoxy guide explains the difference.
Choosing the best bar top epoxy
Most branded bar top epoxy resins work well when used correctly, so compare the features that matter for your bar:
- Clarity and UV resistance. Look for an ultra clear bar top epoxy with UV stabilisers, especially for bars near windows or outdoors under cover. All epoxy yellows with enough sunlight, but stabilised products last far longer. Our guide to UV resistant epoxy resin explains why.
- Self-levelling. A good self-levelling bar top epoxy flattens out brush marks and minor ripples on its own.
- Heat resistance. Typically around 50–60°C once fully cured. Hot plates and pans still need a mat.
- Food contact. Some products state food-safe compliance once fully cured; check the datasheet if the surface will be used for food preparation.
- Working time. Around 30–45 minutes is typical; longer helps on large bars.
- Low odour. Useful when pouring indoors in a pub, kitchen or home bar.
How much bar top epoxy do you need?
Multiply length × width × coat thickness. For a 240 × 60 cm bar at 3 mm, that is 4.3 litres for one flood coat, plus 10–15% for edge run-off. Most bars need a thin seal coat and one or two flood coats. Our epoxy calculator will work it out in litres and US gallons.
How to epoxy a bar top: step by step
1. Prepare the surface
The top must be solid, dry, clean and as level as you can make it, because epoxy will find any slope and run downhill. Check with a long spirit level and shim the base if necessary. Sand bare timber to 80–120 grit, fill large cracks and knots, and remove all dust with a vacuum and a dry lint-free cloth. Existing varnish or paint must be sound and well scuffed, or removed.
2. Protect the room and the edges
Cover the floor and base with plastic sheeting. Decide on the edge: either let resin run over and drip off the edges for a fully coated look, or create a dam with tape for a crisp edge that you finish separately. Put masking tape on the underside of the edges so drips can be peeled away cleanly.
3. Apply a seal coat
Brush or squeegee a thin coat over the whole top, including the edges and any embedded items. This seals the pores so air does not bubble up through the flood coat, and it glues down coins, bottle caps or photos so they cannot float. Our guide to the epoxy sealer for wood covers this step in depth. Let it cure until tacky or, if it fully hardens, scuff with 220 grit before continuing.
4. Mix the flood coat
Work at roughly 21–25°C, with resin and hardener at room temperature. Measure exactly, mix slowly for 3–5 minutes scraping the sides and base, then transfer to a second clean container and mix for another minute. This double-pot method avoids unmixed resin from the bucket walls, a common cause of soft, sticky patches.
5. Pour and spread
Pour in a slow ribbon or in several puddles along the bar, then spread with a notched or flat plastic spreader, working towards the edges. Use a foam brush to cover the edges evenly. Don’t overwork it; bar top epoxy levels itself.
6. Remove bubbles
After 10–15 minutes, pass a heat gun or small torch quickly over the surface, held several centimetres away and always moving. Repeat once or twice over the next half hour. Too much heat in one place causes ripples or scorch marks.
7. Cover and cure
Rig a dust cover above the top without touching it, keep pets and people away, and keep the room warm for at least 24 hours. Most bar tops can be used gently after 72 hours, with full hardness at around 7 days.
Epoxy bar top ideas
Because the resin is clear and thick, a bar top makes an excellent display surface. Popular epoxy resin bar top ideas include:
- Embedded collections: coins, bottle caps, beer mats, wine corks or photos, sealed down first. See how to embed objects in resin.
- Metallic swirl finishes using pigments and mica over a base coat, a look explored on our metallic epoxy table page.
- Live edge bar tops where one slab edge is left natural and fully encased.
- Lit bar tops with LEDs or fibre optic points shining through the resin.
- Ocean or river effects with tinted resin and white cells along the edges.
Common bar top epoxy mistakes
- An uneven bar, leading to thin spots on one side and a thick pool on the other.
- Inaccurate measuring or short mixing, giving tacky spots that never cure.
- Skipping the seal coat, which leaves bubbles around knots and embedded objects.
- Pouring too thick in one coat, risking heat build-up, waves and yellowing.
- A cold room, causing a cloudy, slow cure and surface blush.
Care and repair
Clean with mild soapy water and a soft cloth; avoid abrasive pads and solvents. Use mats under hot items. Light scratches can be sanded out and polished, as explained in how to polish epoxy resin, while deeper damage can be scuffed and given a fresh flood coat.
Safety
Ventilate the room well, wear nitrile gloves and eye protection, and use a respirator with organic vapour cartridges in enclosed spaces. Keep the torch away from plastic sheeting and solvents.
Top 10 most-watched on YouTube
Video 1 of 10 — one of the most-viewed YouTube videos for “bar top epoxy: choosing and pouring the perfect finish”: Use Epoxy To Coat Existing Countertops To Make Them Look Like Real Stone | Step By Step Explained by Leggari Products (20,368,328 views as of 13 October 2026).
If you want the chemistry behind that hard, glossy finish, Britannica’s entry on epoxy explains how resin and hardener cross-link into a tough thermoset plastic, which is why a well-cured bar top resists heat, spills and wear.
Watch it being made
See one of our tables come together in the workshop: a nebula resin top with fibre optic stars, from the first pour to the lights going on.
Resin art nebula resin table with fibre optic art. More builds on the Go Bespoke YouTube channel.
Frequently asked questions
How do you epoxy a bar top?
Level and sand the top, apply a thin seal coat, then pour a roughly 3 mm self-levelling flood coat, spread it to the edges, remove bubbles with gentle heat and let it cure for at least 72 hours under a dust cover.
What is the best bar top epoxy?
The best bar top epoxy for most people is an ultra clear, UV-stabilised, self-levelling coating epoxy with a simple 1:1 mix ratio and a 30–45 minute working time.
How thick should an epoxy bar top be?
Usually around 3 mm per flood coat. Build extra thickness with additional coats rather than one deep pour.
Is an epoxy bar top heat resistant?
It tolerates warm mugs and glasses, but most epoxies soften at around 50–60°C, so always use a mat under hot dishes.
Can you put bar top epoxy over a varnished surface?
Yes, if the existing finish is sound and well adhered. Clean it, scuff thoroughly and remove all dust first.
Thinking about a bespoke resin bar or counter rather than a DIY pour? Contact Go Bespoke to talk through ideas, or watch our builds on the Go Bespoke YouTube channel.