Clear Epoxy Resin: How to Get Glass-Clear Results
Updated 17 October 2026
Nothing shows off a beautiful piece of timber, a pressed flower or a fibre-optic constellation like resin that looks like glass. Yet plenty of pours that start water-white end up cloudy, bubbly or tinted yellow a year later. Getting truly clear epoxy resin results is less about buying a magic product and more about controlling a handful of factors: the chemistry of the resin, the temperature you work at, how you mix, the moisture in the room and how much sunlight the finished piece will see. This guide explains each one and how to judge which product is the clearest for your project.
If you are new to resin chemistry, our epoxy resin hub covers how resin and hardener react and how epoxy differs from polyester and polyurethane resins.
What makes clear epoxy resin clear?
Cured epoxy is naturally a transparent plastic. Whether it stays that way depends on three things:
- The raw materials. Higher-grade resins and hardeners start with very little colour (a low “Gardner” colour rating on technical data sheets) and contain stabilisers that slow yellowing.
- What gets trapped in it. Air bubbles, unmixed streaks, dust and moisture all scatter light and turn a clear pour hazy.
- What happens afterwards. UV light and heat gradually break down the polymer, which shows up as ambering.
The three enemies of clarity
1. Bubbles
Bubbles come from stirring air in, from air escaping out of porous timber and from mixing cold, thick resin. To minimise them:
- Warm both parts to around 24–27°C in a water bath before mixing so the viscosity drops.
- Stir slowly and steadily for the full recommended time, scraping the sides and base, rather than whipping.
- Seal wood first with a thin coat; our guide to epoxy sealer for wood shows how.
- Pass a heat gun or small torch quickly over the surface within the first 10–15 minutes to pop rising bubbles.
2. Amine blush and cloudiness
When humidity is high or the surface is cold, the hardener can react with moisture and carbon dioxide in the air, leaving a waxy, greasy or milky film called amine blush. It dulls the shine and stops the next coat bonding properly. Keep relative humidity below about 60%, keep the surface at least 3°C above the dew point and avoid gas or paraffin heaters, which release water vapour. If blush does appear, wash it off with warm soapy water and a scouring pad, rinse, dry and lightly sand before recoating.
Cloudiness can also come from incomplete mixing, from moisture in the mixing cup or from the resin having crystallised in a cold store. Crystallised resin looks grainy; warming the sealed bottle in hot water until it clears fixes it.
3. Yellowing
All epoxies eventually yellow to some degree under UV exposure. Better products include UV stabilisers and hindered amine light stabilisers (HALS) that slow the process considerably, but they do not stop it entirely. Keep clear pieces out of direct sunlight where possible, and for windowsills or conservatories consider a UV-resistant epoxy resin or a UV-stable varnish over the top. Heat also accelerates yellowing, which is why overheating a thick pour can leave it amber from day one.
Choosing the clearest resin for your project
“Clearest” is meaningless without context, because clear epoxy resin sold for coating and resin sold for casting are formulated differently. Match the product to the depth first, then judge clarity.
| Project | Resin type | Typical pour depth | Clarity tips |
|---|---|---|---|
| Tabletop or bar-top flood coat | Coating / table top epoxy (often 1:1) | Up to about 3–6 mm per coat | Seal first, torch bubbles, keep dust off with a tent |
| River table or thick casting | Deep pour casting resin (often 2:1 or 3:1) | 25–100 mm depending on product | Slow cure releases bubbles itself; never exceed max depth |
| Jewellery and small moulds | Low-viscosity art resin or UV resin | A few mm | Warm resin, pressure pot for perfect results |
| Embedding flowers or objects | Casting resin poured in layers | Per product limit | Seal porous items to stop air release |
For thick work, our guide to deep pour epoxy explains why a slow, low-exotherm resin is essential for a clear river. For thin coats, see table top epoxy. Small craft pieces are often easier in UV resin, which cures in minutes under a lamp but is limited to thin layers.
What to look for on the label and data sheet
- Maximum pour depth per layer, and the mixing ratio (by volume or weight).
- UV stabilisers / HALS mentioned explicitly, rather than vague “non-yellowing” claims.
- Low initial colour: some data sheets quote a Gardner or APHA colour value; lower is clearer.
- Self-degassing or low viscosity for bubble release.
- Batch date: old hardener tends to darken in the bottle, so buy fresh and store sealed in a cool, dark place.
A simple home test is to pour a 10 mm puck of each candidate into a silicone cup, let it cure fully, then place them side by side on white paper and on a sunny windowsill for a few weeks. You will quickly see which stays crystal clear and which drifts yellow.
Step-by-step: pouring for maximum clarity
- Set up the room at a steady 20–25°C with humidity below 60%, and leave it warm for the whole cure.
- Clean and seal the surface or mould; blow off dust with compressed air.
- Measure accurately using graduated cups or scales, following the stated ratio exactly.
- Mix slowly for 3–5 minutes, then pour into a second clean container and mix again briefly (the “double cup” method) to avoid unmixed resin from the sides.
- Pour and spread gently, holding the cup low to avoid folding air into the surface.
- De-gas the surface with a heat gun after a few minutes, repeating once or twice.
- Cover with a dust tent or box raised off the surface and leave undisturbed for the full cure time.
For the full pouring workflow, including temperatures and layering, see how to pour epoxy resin.
Restoring clarity after curing
Minor haze, sanding marks or dull patches can usually be polished back to a glassy finish. Work through wet abrasives from about 400 up to 3000 grit, then a polishing compound on a soft pad, as described in how to polish epoxy resin. Deep bubbles or yellowing cannot be polished out; they need a fresh flood coat or, for yellowing, a new piece.
Safety
Clear epoxy resin is just as hazardous to skin as any other epoxy. Wear nitrile gloves, protect your eyes, ventilate the room and never sand partly cured resin. For more on the polymer chemistry behind curing, hardeners and stabilisers, the Wikipedia article on epoxy is a useful technical reference.
Watch it being made
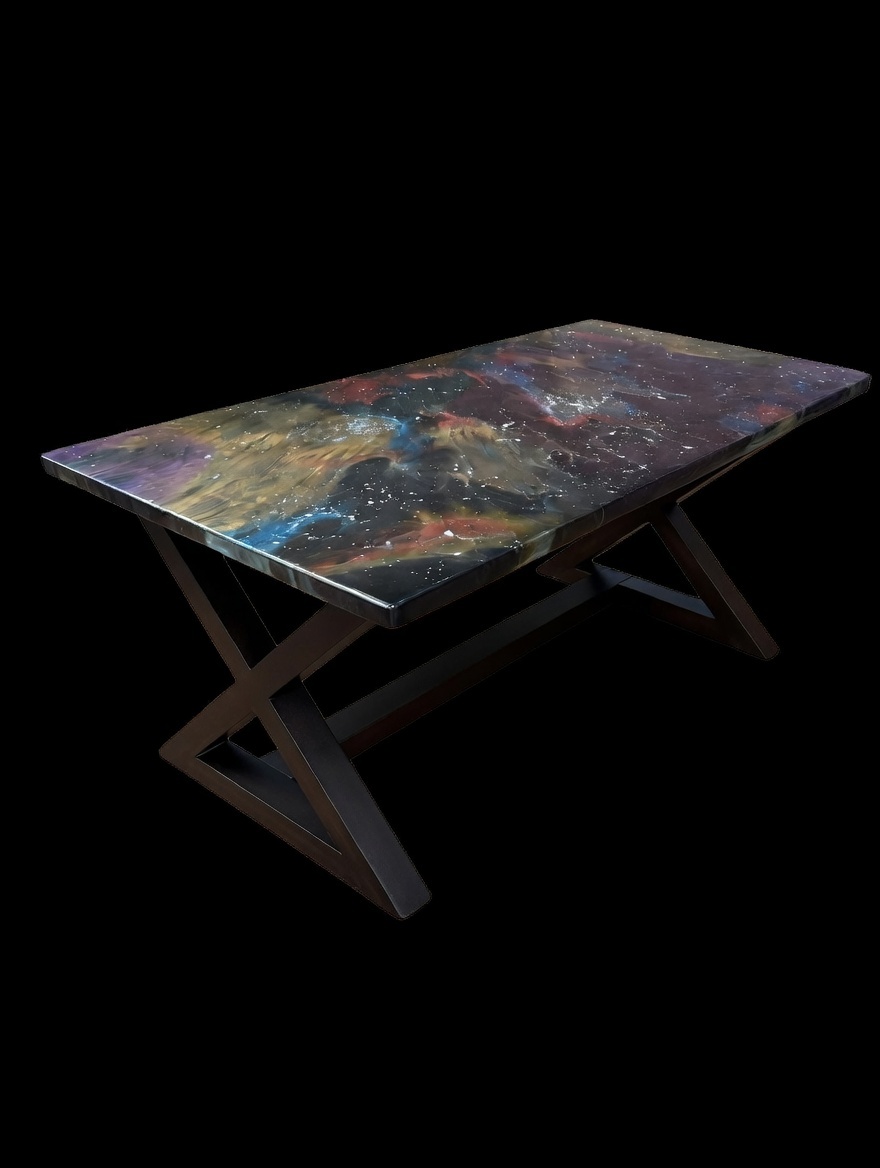
Watch our first light-up resin table being made in the workshop, with dragons and creatures appearing in the resin art, and the colours, pours and finishing shown step by step.
Resin Art Dragons and creatures in resin art table My First Light-Up Resin Table. More builds on the Go Bespoke YouTube channel.
Frequently asked questions
What is the clearest resin for casting?
Look for a low-viscosity deep pour casting resin with UV stabilisers and a slow cure; slow-curing resins release bubbles and run cooler, which keeps them clearer. Always compare samples yourself rather than relying on marketing claims.
Why is my clear epoxy cloudy?
Common causes are high humidity (amine blush), moisture in the mix, cold temperatures, incomplete mixing or micro-bubbles. Warm the resin, mix thoroughly and control the room.
Does crystal clear epoxy stay clear forever?
No. Even the best products gradually yellow with UV and heat exposure. Stabilisers slow it significantly, and keeping pieces out of direct sun helps most.
Is clear resin epoxy the same as UV resin?
No. Epoxy is a two-part system that cures chemically and can be poured thick; UV resin is a single-part resin that cures under ultraviolet light and suits thin layers only.
Can I make clear resin tables at home?
Yes, with patience and the right deep pour resin, sealed timber, a warm room and a good mould. Expect to sand and polish the top for a glass-like finish.
Love the look of glass-clear resin furniture? Browse our clear epoxy table page, or get in touch about a bespoke commission.