Epoxy Sealer for Wood: How to Seal Timber Before and With Epoxy
Updated 13 October 2026

An epoxy sealer for wood does one simple but vital job: it closes the pores of the timber so that the resin you pour later stays clear and bubble free. Wood is full of air, especially in end grain, burr, spalted areas and live edges. Cover it in a thick pour and that air slowly rises through the resin as it cures, leaving trails of tiny bubbles frozen in place. A thin seal coat, applied first and allowed to set, stops this at the source.
This guide explains how to seal wood for epoxy before a pour, which products work as an epoxy wood sealer, and how to use penetrating epoxy to stabilise soft or cracked timber. It sits alongside our core guide to how to pour epoxy resin, which covers mixing and pouring in general.
Why seal wood before epoxy?
There are four good reasons to seal timber before any significant pour:
- Outgassing. As resin warms during cure, air inside the wood expands and escapes upwards. Sealing traps it in place.
- Resin absorption. Dry, open-grained timber soaks up resin, leaving the edges of a river or flood coat starved and uneven.
- Colour bleed. Pigmented resin can wick into the grain, staining the wood beside a river. A clear seal coat gives a crisp line.
- Stability. Soft, punky or cracked areas are strengthened and bonded together.
Skipping this step is one of the most common reasons first-time builders end up with cloudy edges and bubble streams along the live edge of a river table.
Types of epoxy sealer for wood
Not every sealer is compatible with epoxy, so it is worth understanding the options.
| Sealer | Best for | Notes |
|---|---|---|
| Thin coat of your casting or coating epoxy | Most resin tables and coated tops | Guaranteed compatibility; brush on, let it reach a tacky stage, then pour. |
| Penetrating epoxy wood sealer (low viscosity) | Soft, spalted or porous timber | Very thin, soaks deep into fibres and hardens them; slower to cure. |
| Thin CA (superglue) | Small cracks and loose bark spots | Quick spot repairs only; not a full seal coat. |
| Water-based or oil finishes | Not recommended under epoxy | Oils and waxes can prevent adhesion; avoid on any surface that will meet resin. |
Whichever epoxy sealer for wood you choose, it must be fully compatible with the resin going on top. For most projects, the simplest and most reliable epoxy resin sealer for wood is the same resin you plan to use, or a coating epoxy from the same manufacturer. That removes any doubt about compatibility between layers.
How to seal wood for epoxy: step by step
1. Check the moisture content
Sealing does not fix wet timber. Use a moisture meter and aim for around 8–12% for indoor furniture. Wet wood keeps moving and releasing vapour, which can cause cloudiness, poor adhesion and cracking later on.
2. Clean and prepare the surface
Remove loose bark, dirt and soft rot with a wire brush or a stiff nylon brush. On live edges, decide whether to keep the bark; if so, it must be firmly attached and sealed, or it will eventually detach inside the resin. Sand flat faces to around 80–120 grit, then vacuum and wipe with a lint-free cloth. Avoid damp cloths and do not use oils or silicone-based cleaners.
3. Mix a small batch
Mix only what you can use in the working time, usually a few hundred millilitres for a pair of table slabs. Measure accurately: a seal coat with the wrong ratio may never fully cure and will weaken the bond for everything above it.
4. Apply a thin coat
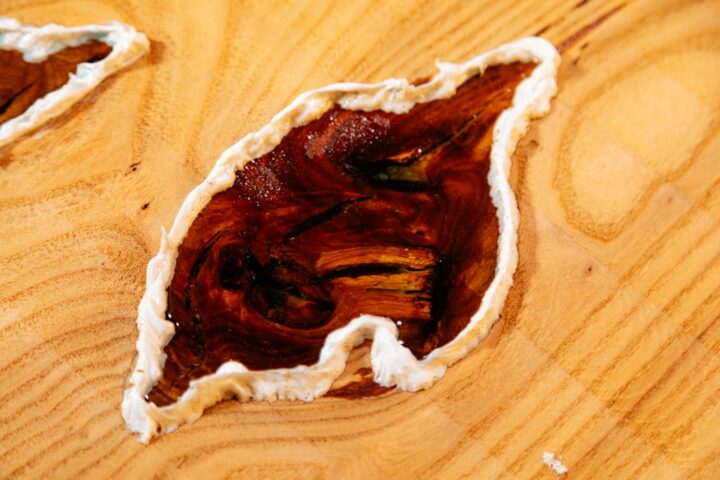
Brush the epoxy onto every surface that will touch the pour: live edges, end grain, the underside of any overhang and knots or cracks. Work it into the grain with a stiff brush or gloved hand. End grain is thirsty, so give it a second pass after 10–15 minutes. Keep the coat thin; you are filling pores, not building a layer.
5. Pop surface bubbles
As the coat soaks in, bubbles appear where air escapes. Pass a heat gun or small torch quickly over the surface to burst them. This is exactly the air that would otherwise have ended up inside your main pour.
6. Time the main pour
Pour when the seal coat is tacky but firm to the touch (it should not transfer to a gloved finger), which is often 2–6 hours depending on resin and temperature. Pouring onto a tacky seal coat gives a chemical bond. If it has cured fully, scuff it lightly with 180 grit, remove the dust and then pour.
Using penetrating epoxy as a wood stabiliser
A penetrating epoxy wood sealer is a very thin, slow-curing epoxy designed to soak deeply into wood fibres. It is useful for spalted timber, punky burr, old reclaimed boards and the soft sapwood found on some live edges. Apply generously, let it soak in, and keep reapplying to dry patches until the wood will not take any more. Allow the full cure time before sanding or pouring over it.
For deep cracks, fill from below first with tape across the underside, then pour the thin epoxy in from above. For very large voids, use your main casting resin instead; our guide to deep pour epoxy explains layer depths and exotherm.
Using an epoxy sealer for wood as the final finish
Epoxy is also used as a final sealer: a flood coat over a finished top gives a hard, waterproof, glossy surface. This is common for bar tops, tables and serving boards. The same rule applies: seal first with a thin coat, then apply the flood coat once the seal is tacky or scuffed, as we explain in the guide to epoxy table top finishes. Remember that epoxy needs a UV-resistant top coat or UV-stabilised resin if it will sit in sunlight.
Mistakes to avoid
- Sealing only the top face and forgetting the sides and ends that sit inside the mould.
- Applying an oil, wax or stain that is not compatible with epoxy before sealing.
- Pouring the main layer onto a seal coat that is still wet, which can drag bubbles up into the pour.
- Sealing timber that is still too wet.
- Applying too thick a seal coat, which can run, sag or leave drips on live edges.
Safety and working conditions
Keep the room at roughly 20–25°C so the seal coat cures predictably. Wear nitrile gloves and eye protection, ventilate the space well, and use a respirator if fumes build up. Brushes used for epoxy are rarely worth cleaning; budget for disposable ones.
Top 10 most-watched on YouTube
Video 1 of 10 — one of the most-viewed YouTube videos for “epoxy sealer for wood: how to seal timber before and with epoxy”: Fire, Epoxy, and Free Wood by Blacktail Studio (5,474,472 views as of 13 October 2026).
For the science of how sealers and film-forming finishes slow moisture movement in timber, the Finishing of Wood chapter of the US Forest Products Laboratory’s Wood Handbook is a free, detailed reference that underpins much of the advice above.
Watch it being made
Watch our first light-up resin table being made in the workshop, with dragons and creatures appearing in the resin art, and the colours, pours and finishing shown step by step.
Resin Art Dragons and creatures in resin art table My First Light-Up Resin Table. More builds on the Go Bespoke YouTube channel.
Frequently asked questions
Do you need to seal wood before epoxy?
For thin coats on dense, smooth hardwood it is sometimes skipped, but for river tables, live edges, end grain and any pour more than a few millimetres deep, sealing is strongly recommended to prevent bubbles and uneven absorption.
What is the best epoxy wood sealer?
Usually a thin coat of the same epoxy system you will pour, because compatibility is guaranteed. For soft or rotten timber, a dedicated penetrating epoxy sealer gives better stabilisation.
How long should a seal coat dry before pouring?
Until it is tacky but does not transfer to a gloved finger, typically a few hours. If it has fully cured, sand lightly before pouring.
Can I seal wood with oil before epoxy?
No. Oils and waxes can stop epoxy bonding to the wood. Save oil finishes for the timber faces after the epoxy work is complete.
Does sealing change the colour of the wood?
Yes, epoxy darkens and enriches timber in the same way water does. Wipe a test patch with water to preview the effect.
Once the slabs are sealed you are ready for the main build; follow our live edge table guide or the wider resin table guide for the next stage. If you would rather have a table built for you, get in touch about a bespoke commission.